![]()
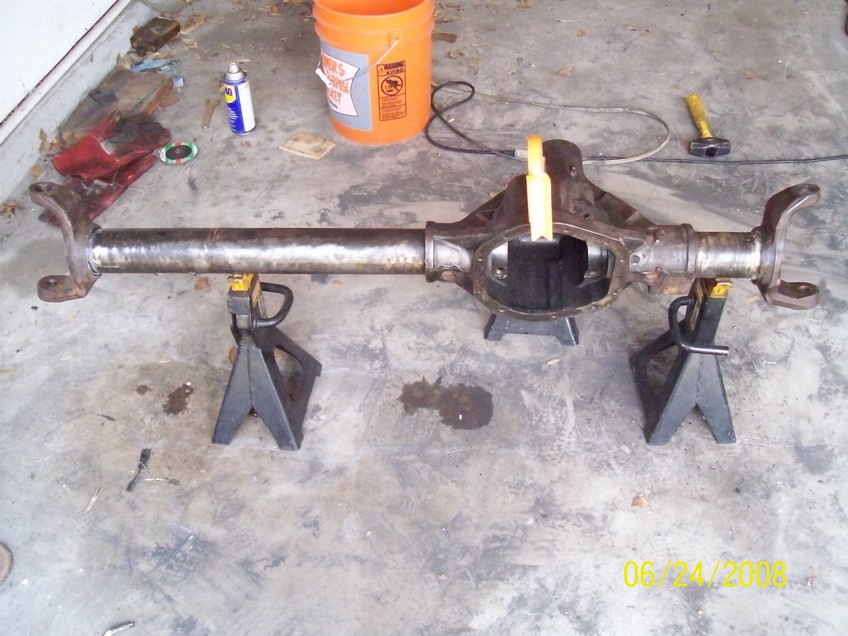
Nissan Frontier (D22) Solid Axle Swap (SAS) with 3 link + Panhard with coil springs.
Warning small pictures and large just click on a picture for the bigger one. (updated 7/2009)
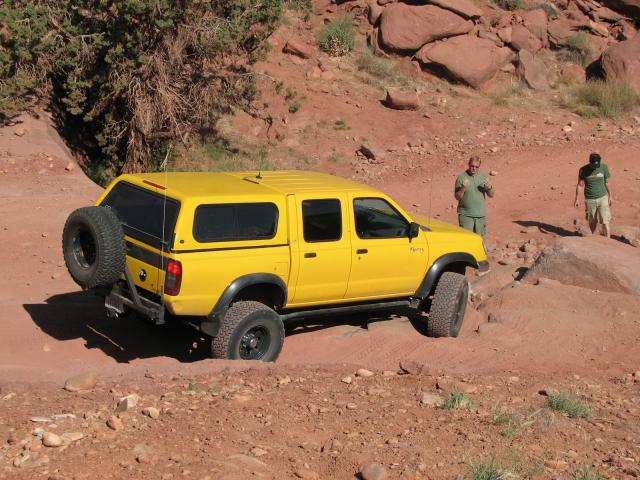 Lifted IFS with 33s.
 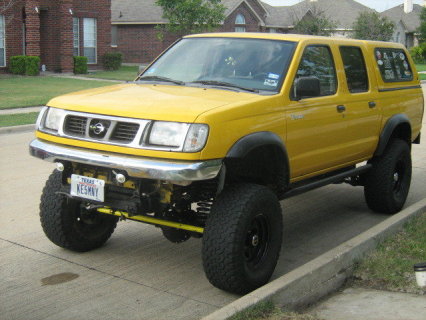 2wd done
 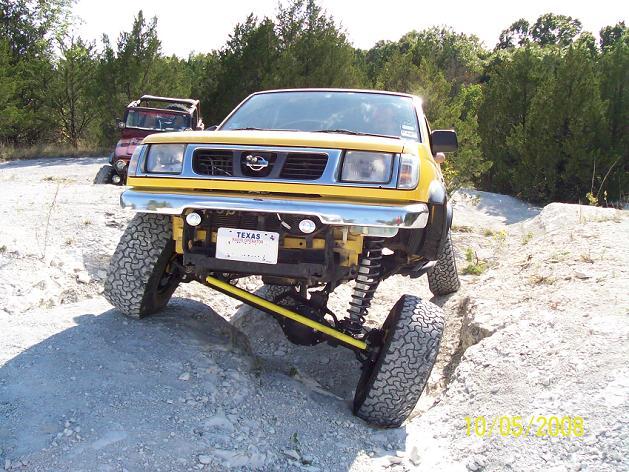 4wd
test drive.
4wd
test drive.
Plan is the best suspension for trail riding the Nissan Frontier D22
Goal is too build this D22 into the best off road vehicle while still keeping it road worthy and street legal. I listed all the parts used and where I got them to help others. Material list has most of the prices and part numbers used. Email Me if you have any questions.
Plan 35" tires, 5.13 gears, 2 link with track bar. Dana 44 from a waggy and SOA rear with Rodeo/Honda dana 44 rear with discs.
- Cut and turn front axle - remove all and cut remove and install C at correct caster.
- Axle prep - ring and pinion gear and locker install
- Deconstruction - remove all old IFS parts and sell
- Lower Link mounts - weld on new mounts to frame and axle
- Upper link mounts - weld on new mount to frame and axle housing.
- Track Bar mounts - weld on 2 mounts and one gusset
- Coil buckets - weld on buckets (adjustable and removal for easy engine access).
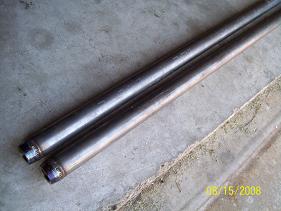
- Links - Make some DOM links with bungs and adjustable Johnny Joints
- Shock Mounts - weld on tabs so there removable for easy engine access.
- Steering - make DOM drag and tie and ream pitman arm. - More info on the SAS steering page.
- Front brakes - install bleed easy.
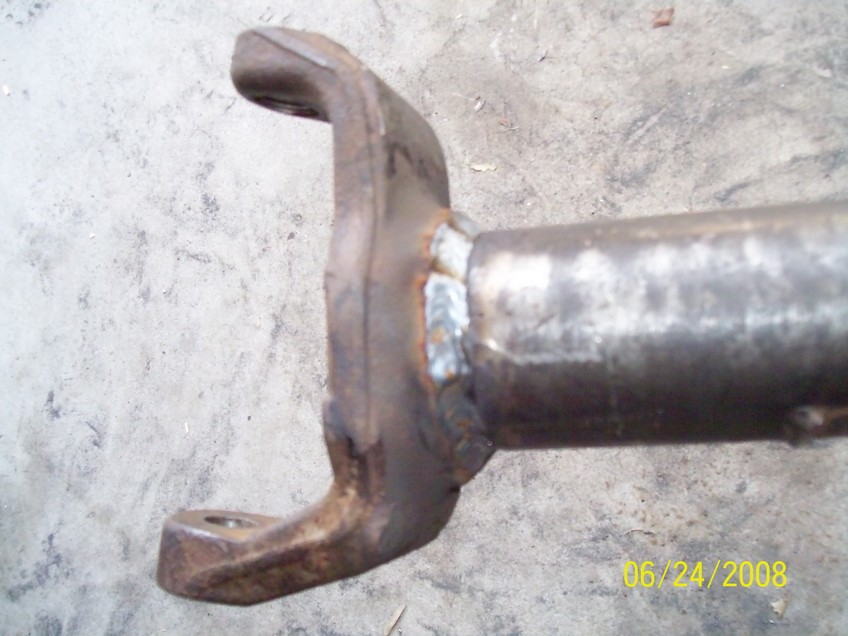
- Front Driveshaft - more information of the SAS driveshaft page
- Transmission cross member mod
- Exhaust modification. - unless you have a KA24 the exhaust will need to be modified for clearance.
- Sway bar - The stock sway still fits, put it back on with a new crossmember.
- Rear suspension
- Material list
1. CUT and TURN
You grind down the weld between the C and the tube. Then using a cut off wheel on a 4.5" angle grinder cut the weld. Then you can pound the Cs off with a sledge hammer. The C is PRESSED on the tube 1 1/4". You have to remove the C to turn it.
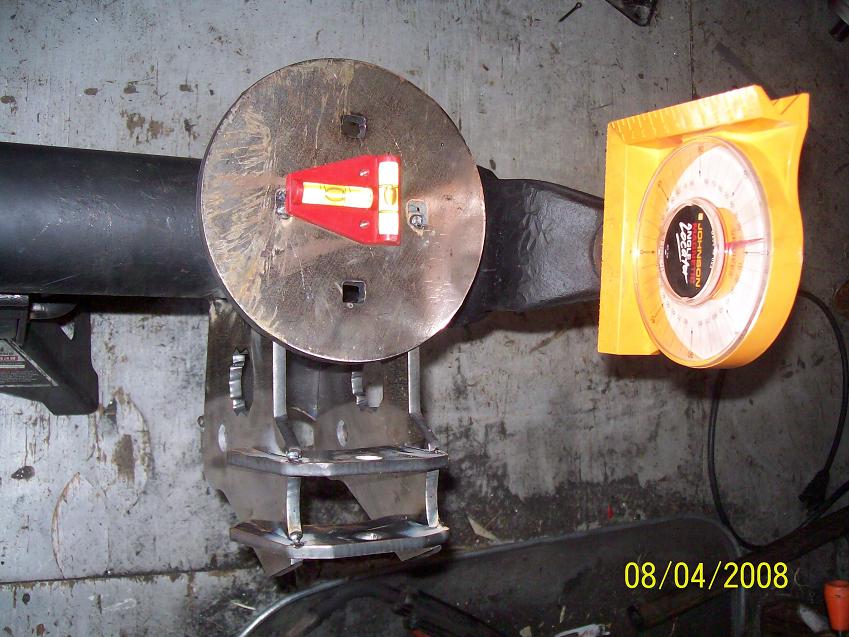
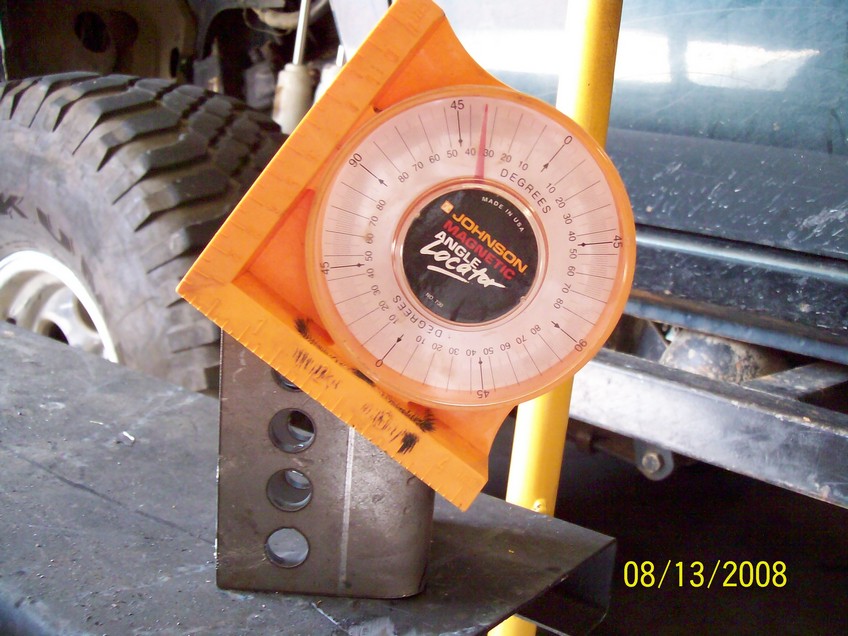
Sand down the tube and apply some grease the pound the C back on. Mock up the axle at pinion angle. 16-28deg pointing at Tcase works best for Nissans. Then welded the Cs back on at 6- 8deg caster at ride height. The C's are forged steel and can be welded with MIG or Flux.
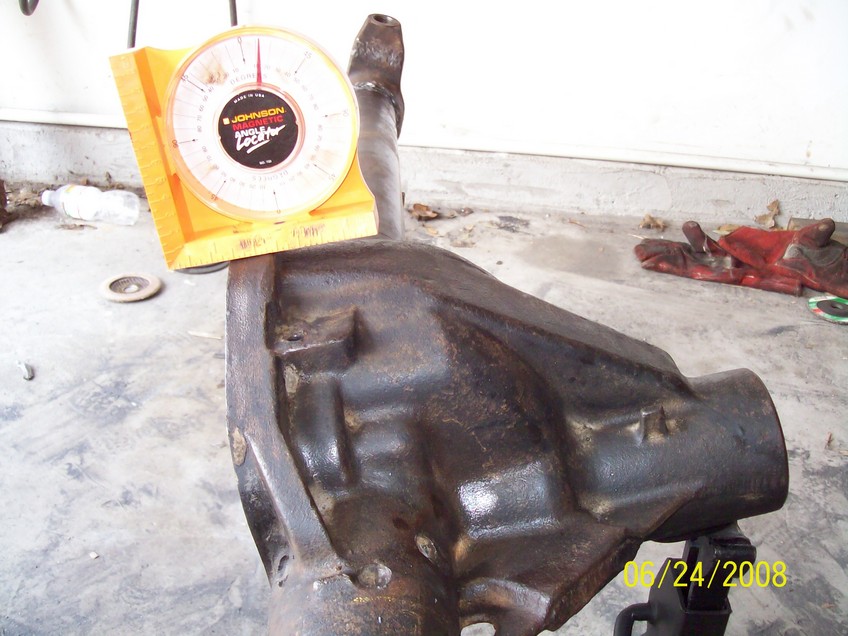
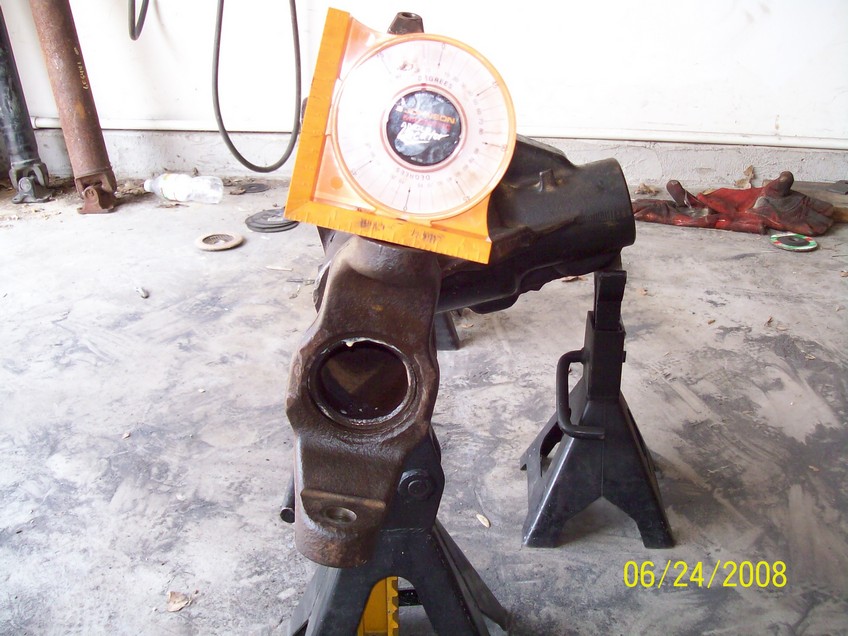
Pumpkin is point up at 16deg Second pic is the caster at 8deg..
Now were ready to start a SAS!
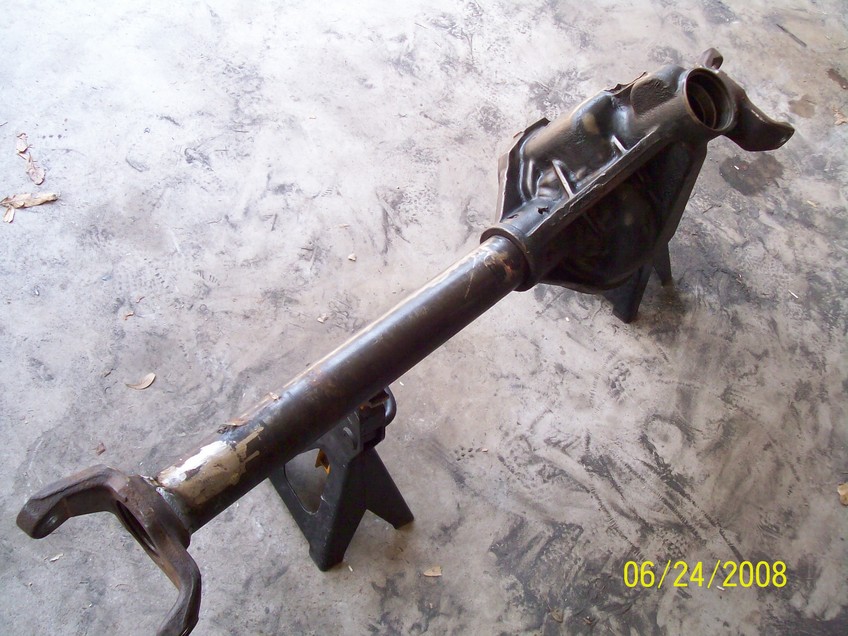
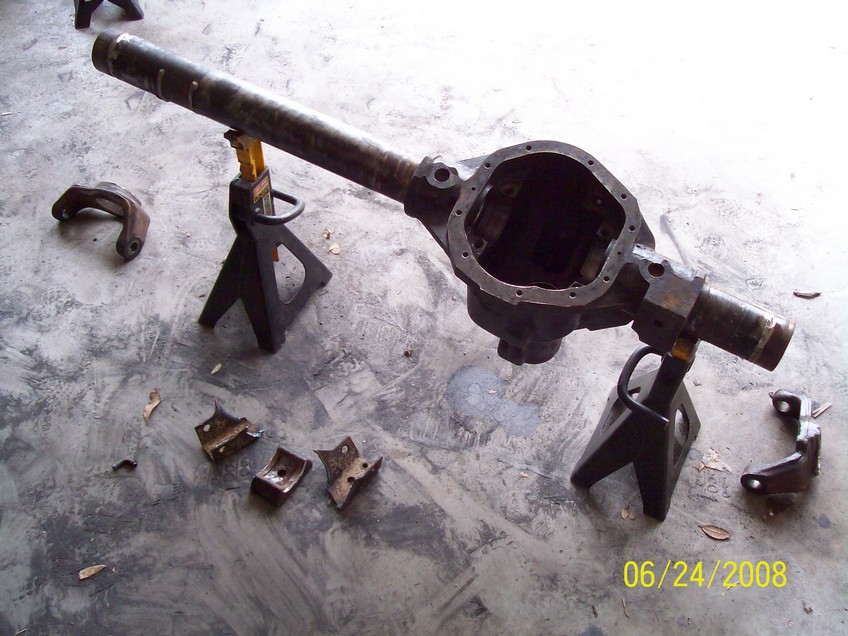
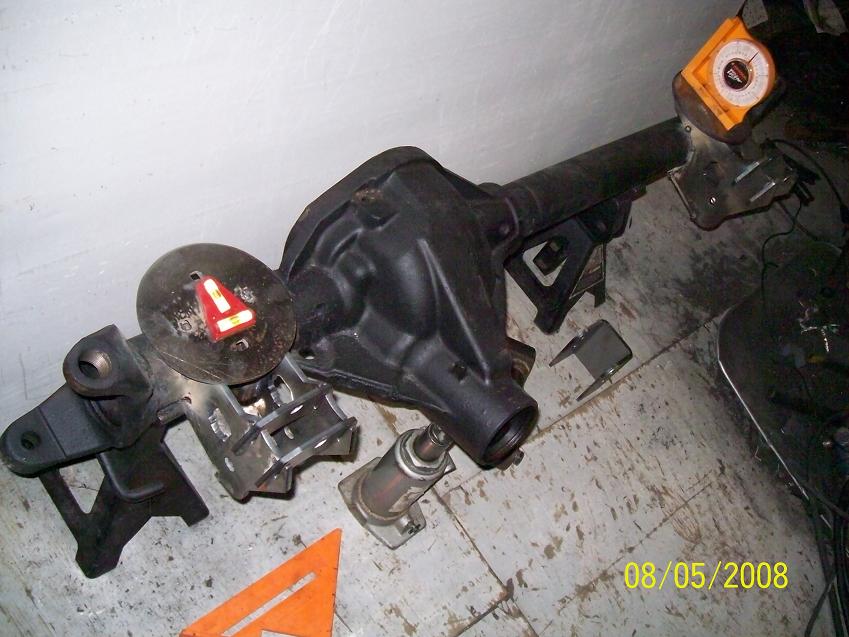
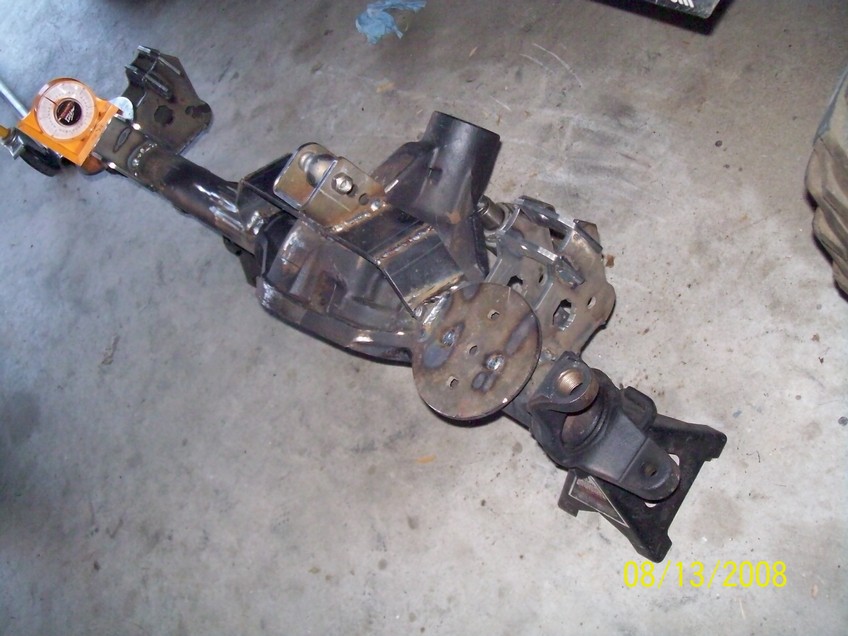
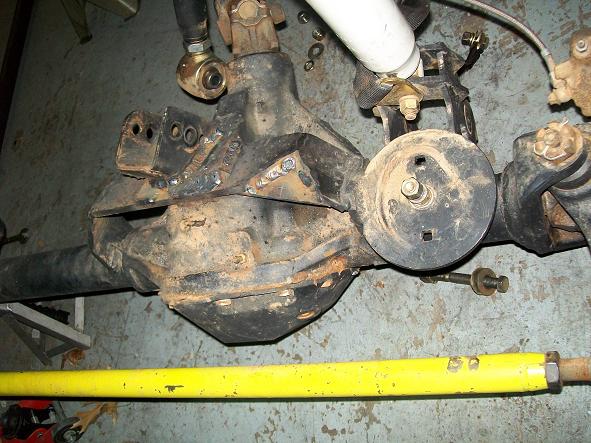
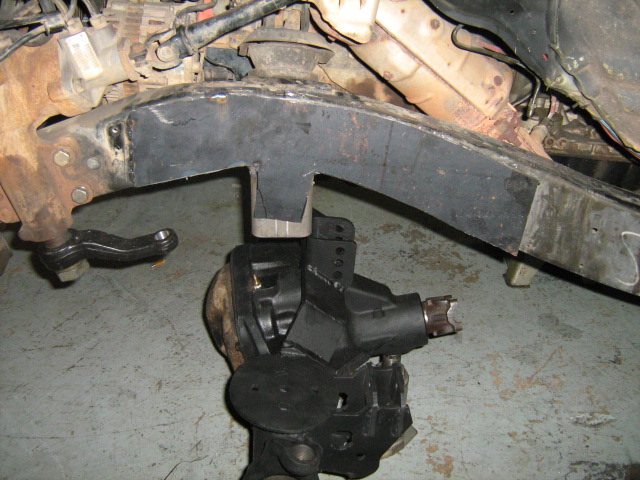
2. Front Dana 44 Axle prep
Install your new gears and locker. A new carrier is needed for 3.92 and lower gears. Stock jeeps have 2.72 gears. Took pinion shims from stock 2.72 pinion. The rest of the carrier is unused. I had to buy a new 3.92-5.xx carrier for my 4.88 gears. I installed a Powertraxx lock right in it. Along with new bearings and shims and gears 4.88 or 5.13 for most Nissan applications.
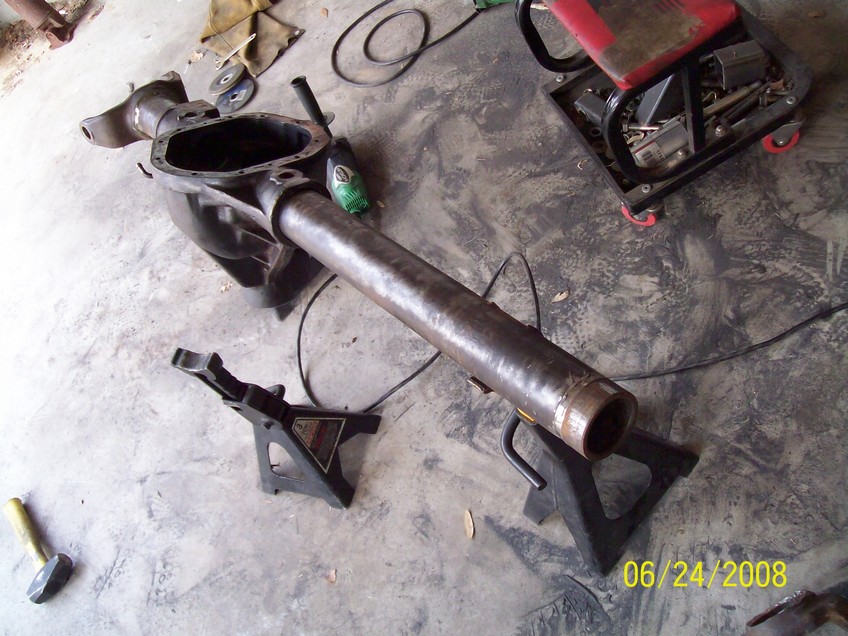
3. DECONSTRUCTION
Strip the frame down. Removed tires, calipers, sway bar, steering (all but steering box) hubs, rotors, UCAs, tbars, shocks, cv axles, 3rd member, LCAs, cross member and rubber brake lines.
Cut off all IFS brackets. Plasma and Sawzall work best. But also used cut off wheel in a grinder is faster if it fits. The D22 has all the upper control mounts
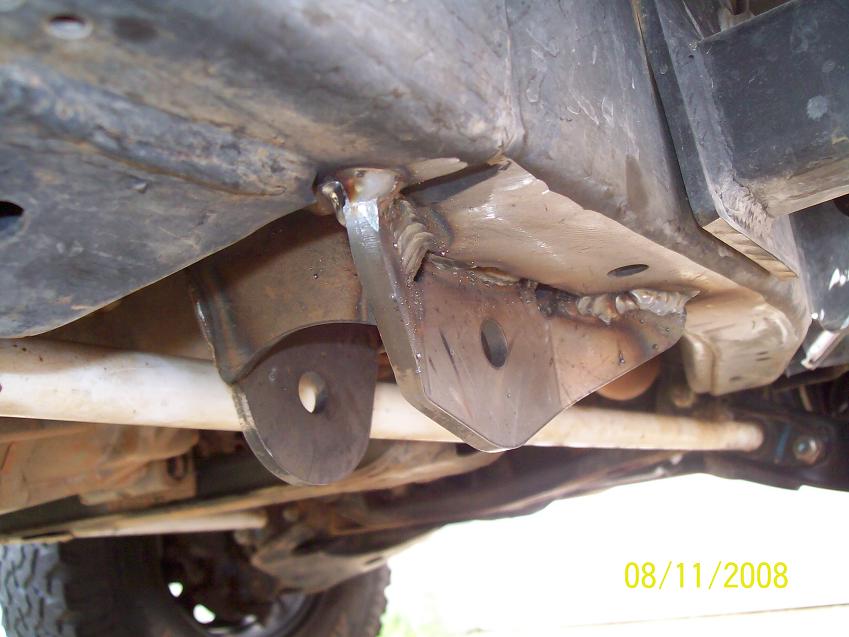
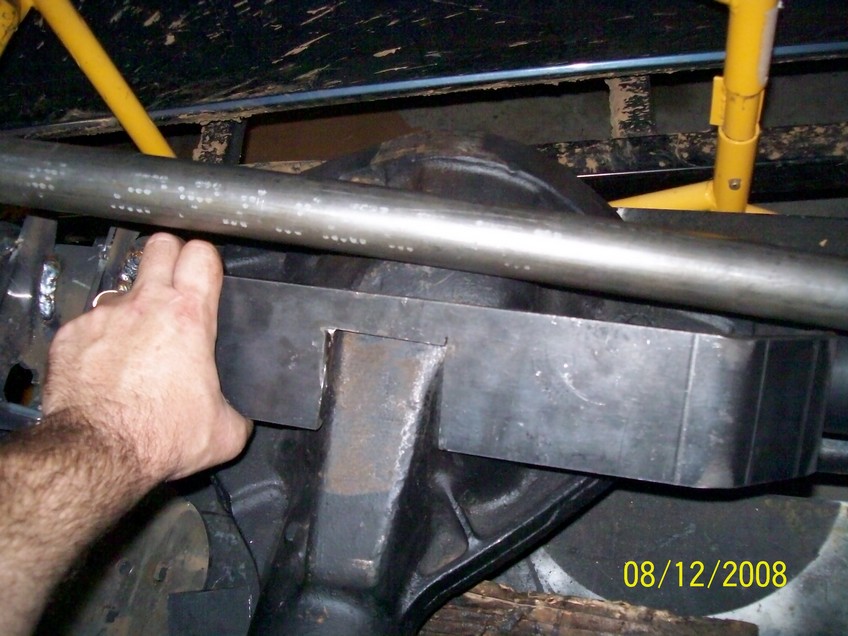
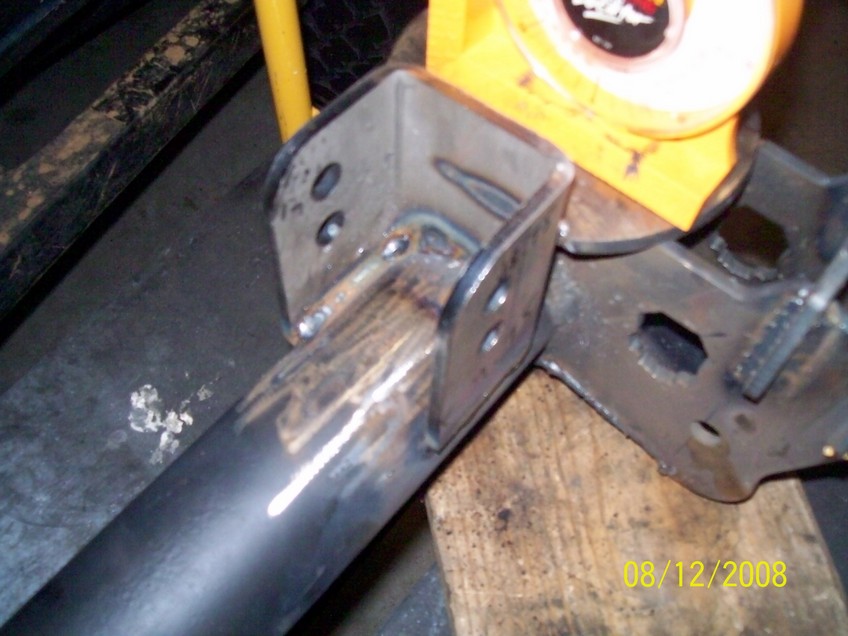
4. Lower LINK MOUNTS
I mounted them 3" from tube end. I had to notch for the pumpkin.
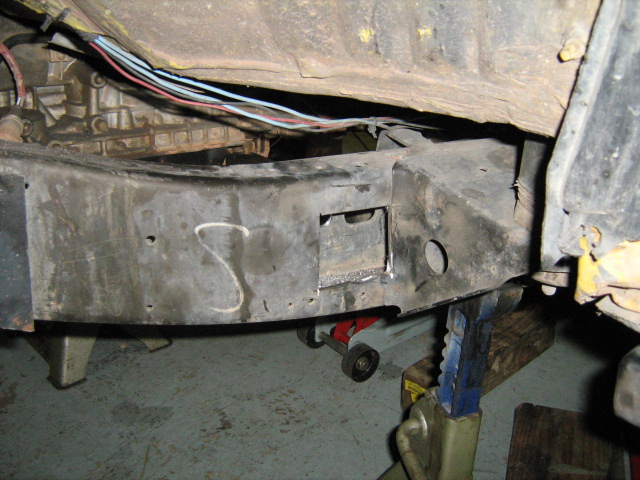
Frame link mounts. There is a perfect place on the frame rail were the frame is 1/4 thick. Its double wall 1/8. I decided to use polyperformance 10deg offset mounts to get them up high and to the side of the frame. They need to be inward of the frame rail for tire clearance. This allows EASY removal of trans/tcase combo in future as needed.
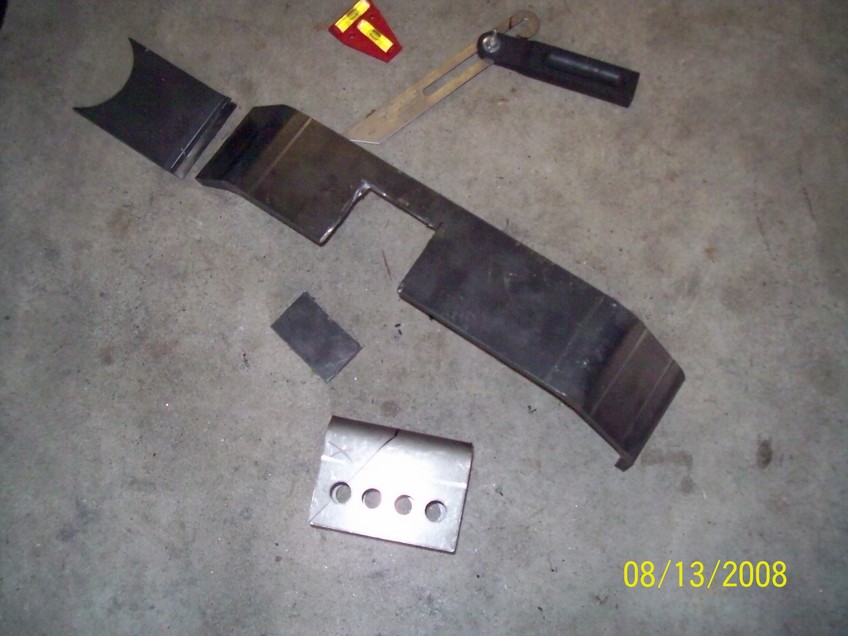
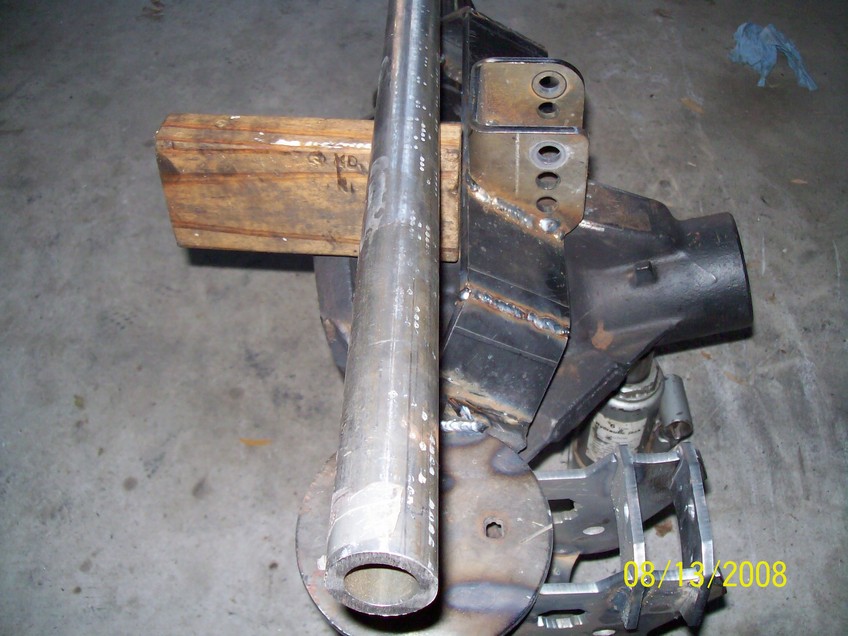
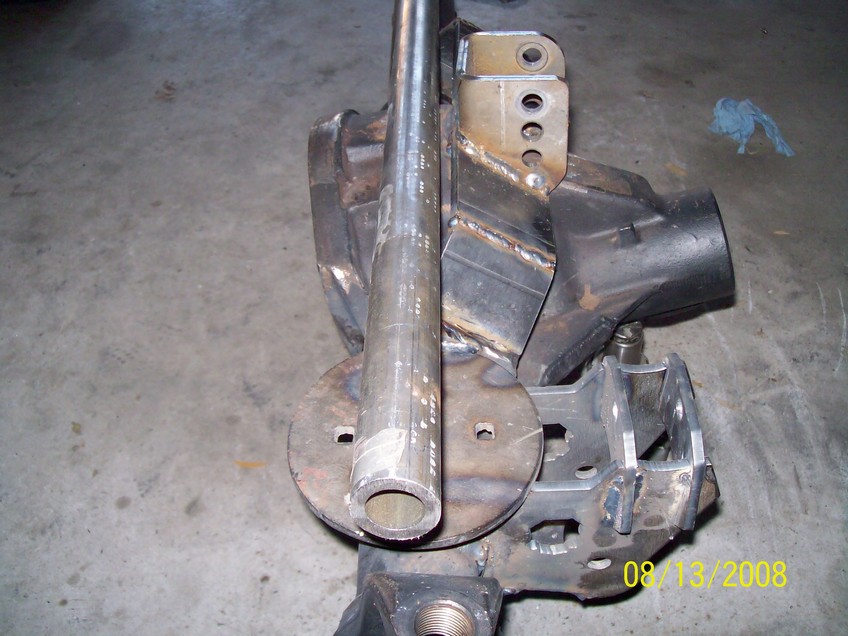
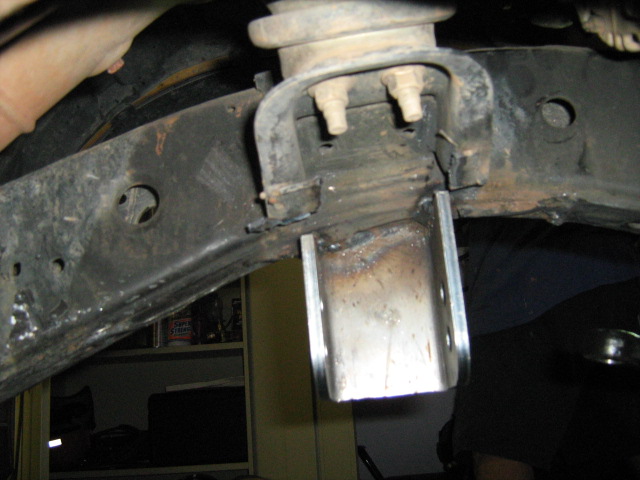
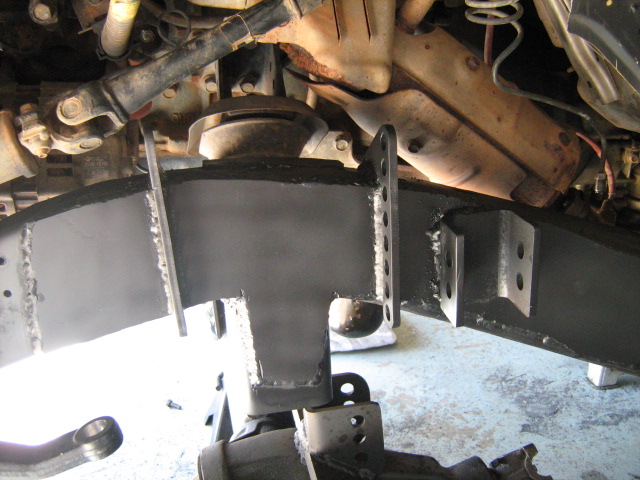
5. UPPER LINK MOUNTS
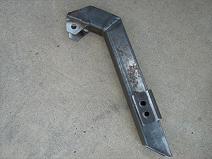
Upper link will start with this 2 piece axle truss. Only the inner piece will be used. Outer was used on my D21 3 link.
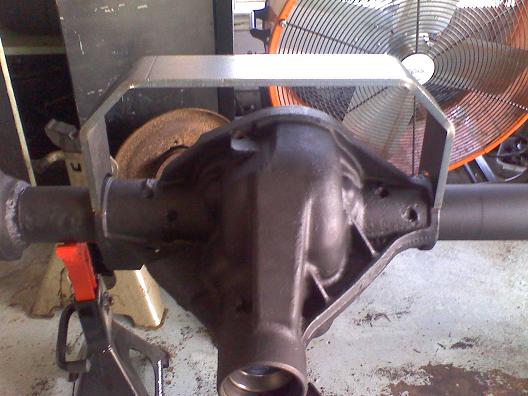
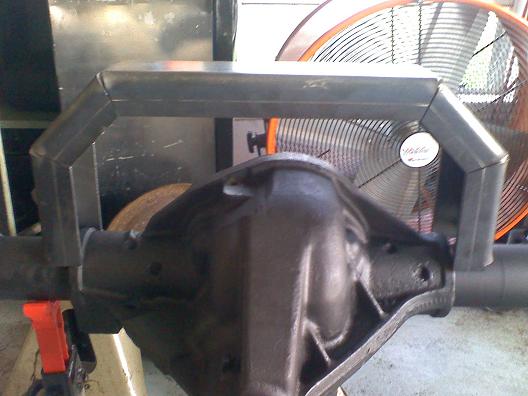
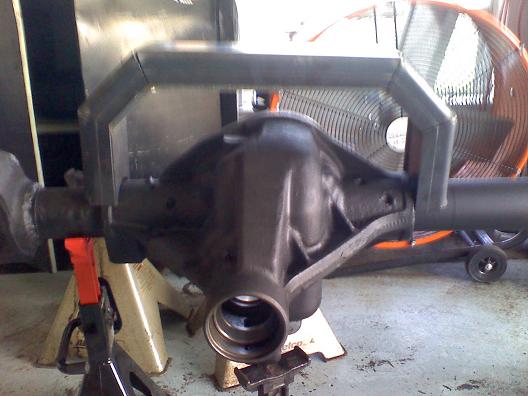
Upper link mount is the most involved mount there is. Started with a 1/2 truss and added basic pocket mount.
Added lots of gussets.
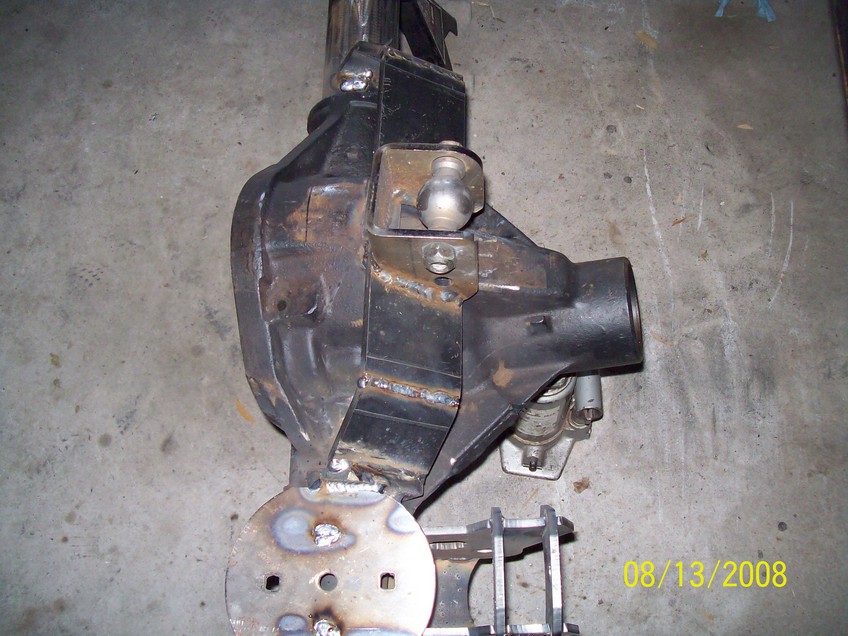
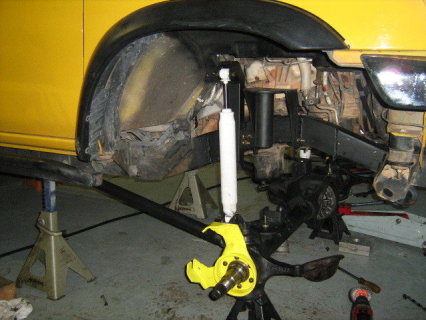
Ride height and full compression mockups.
Update: 1/2009
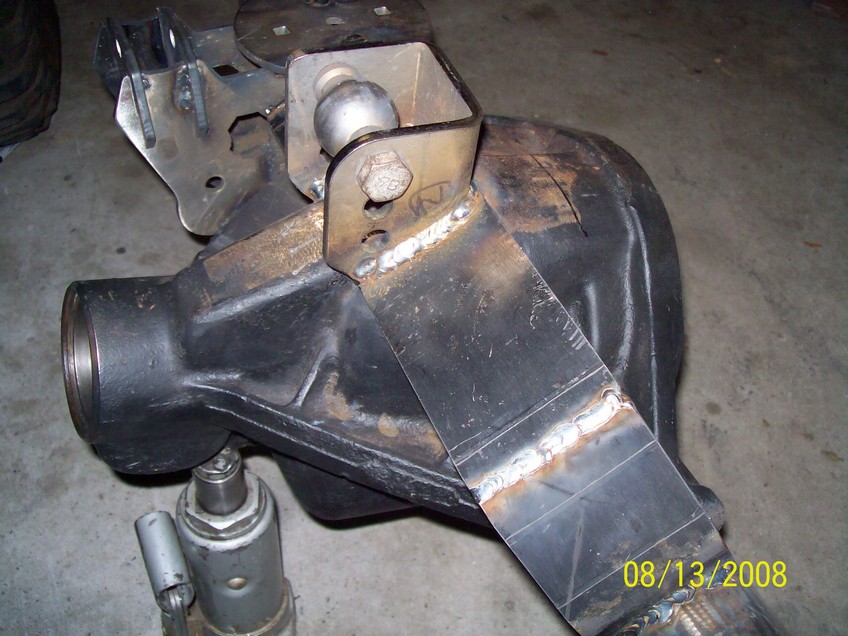
Moved the upper link mount inward 1" and back 1/2" due to rubbing on frame.
Upper link frame mount. I made a spacer for the 6" bolt that goes through the frame. I mounted the link mount to a piece of 3/16 plate frame height and 8" long. Welded to inside frame rail in front of trans mount. I then added some gusset to outside frame rail. The Nissan inner frame rail is thicker than the outer.
![]()
I had to add some flat stock to the bottom of the mount to prevent the mount from flexing.
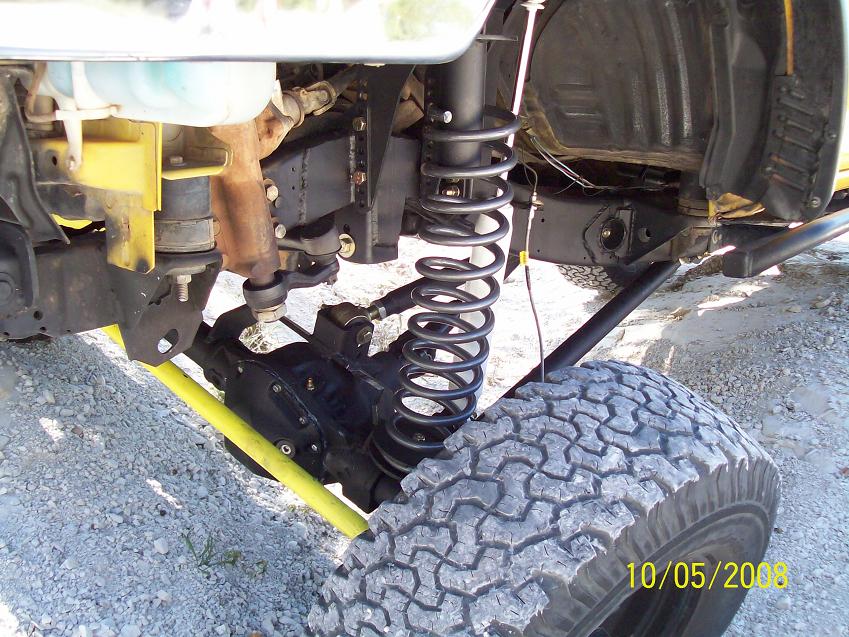
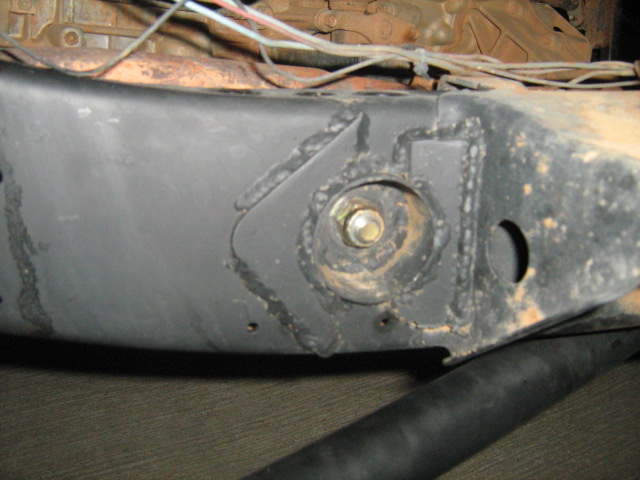
6. Track bar mounts
Mark the frame were you want the center of the axle. The center of the opening appears to be exactly the center of the motor mount. I used a laser level to create a Vertical line from fender down to concrete.
Make a frame rail gusset. Use a 3/16 plate to reinforce the frame rail. Its about 4"x8" long. (DO NOT TACK WELD ON YET!) The track bar upper mount is welded under the frame rail and connected to the coil bucket gusset plate. the mount needs to be shaped to match the curve of the rail. Then clamped to gusset and tacked in. Then remove frame rail gusset and fully weld track bar mount. Reinstall gusset and fully weld gusset to rail.
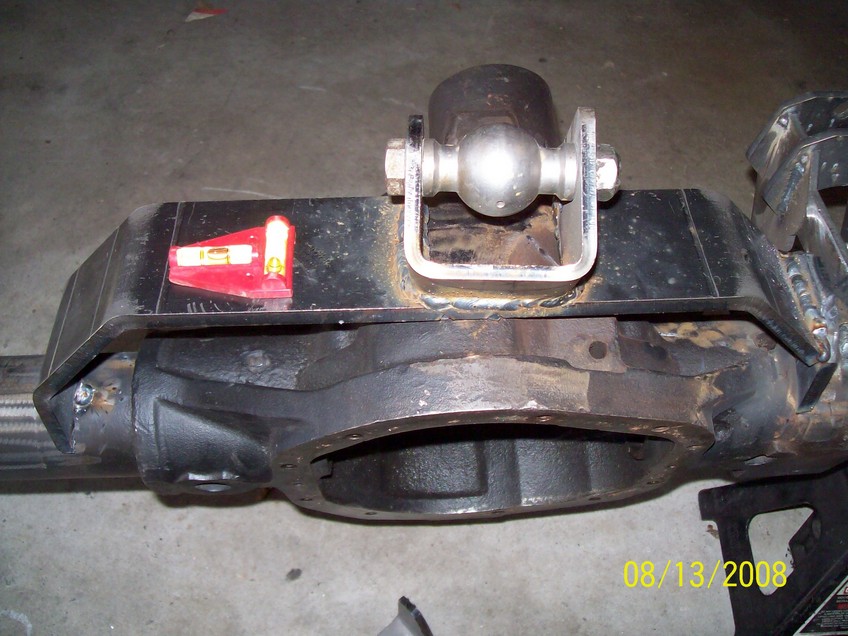
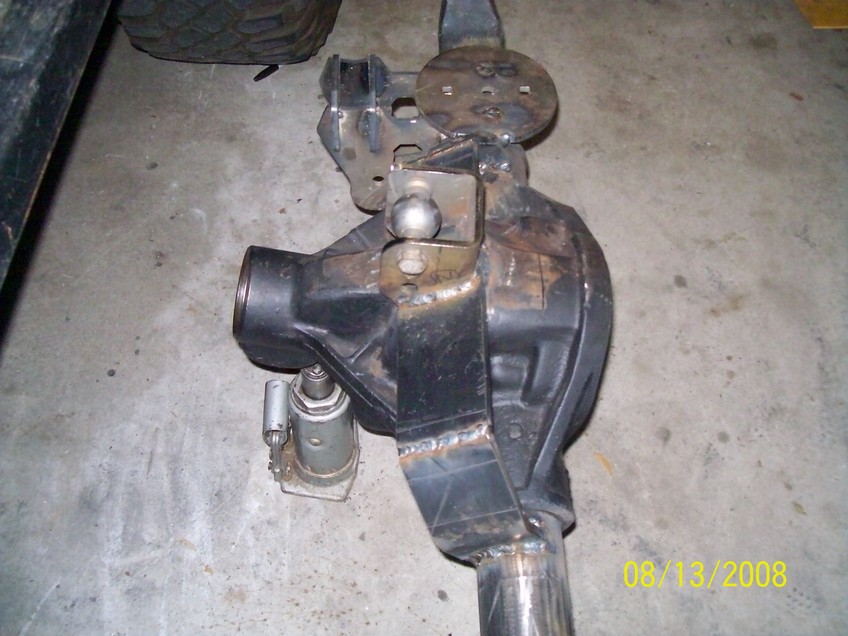
Installed the track bar axle mount. Cut a 3" radius in the bottom of mount and weld on. Trim 1/2" off the coil mount for correct placement. With coil pad level weld bracket to tube.
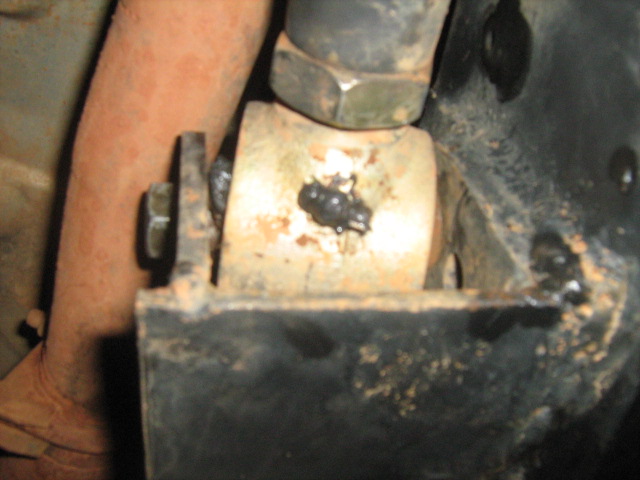
7. COIL BUCKETS
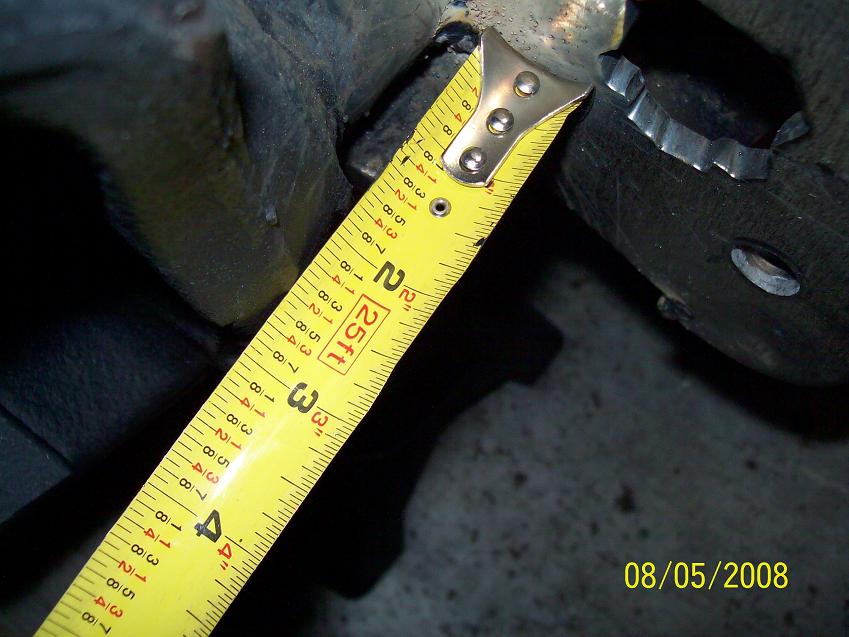
Weld the 3 piece coil buckets together on a bench. Try to keep the sides square as possible. Then bolt on tabs with 1/2" bolts and weld to frame. The coil bucket goes in the axle center line. Basically center of track bar mount. I measure from the steering box holes to get same dimension on both sides.
The coil bucket should be about 7" from the upper steering box bolt center.
I added 7" of tube to prevent the coil from falling out at full droop. The tube is a stock 2wd 2 piece D22 driveshaft. The rubber insulator is a stock Wd21 rear upper one. D22 was converted to 4wd and uses a Nissan one piece for a 2001+ D22.
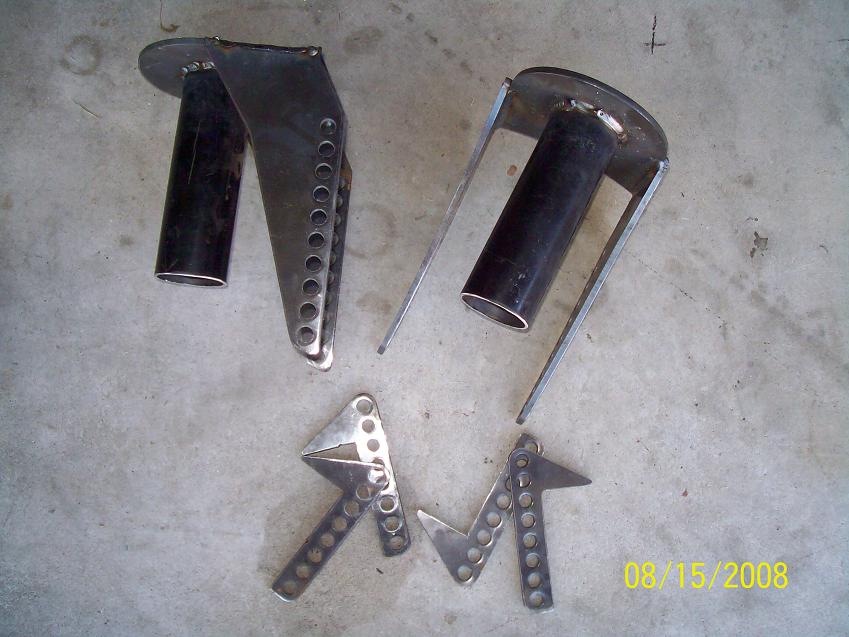
8. LINKS
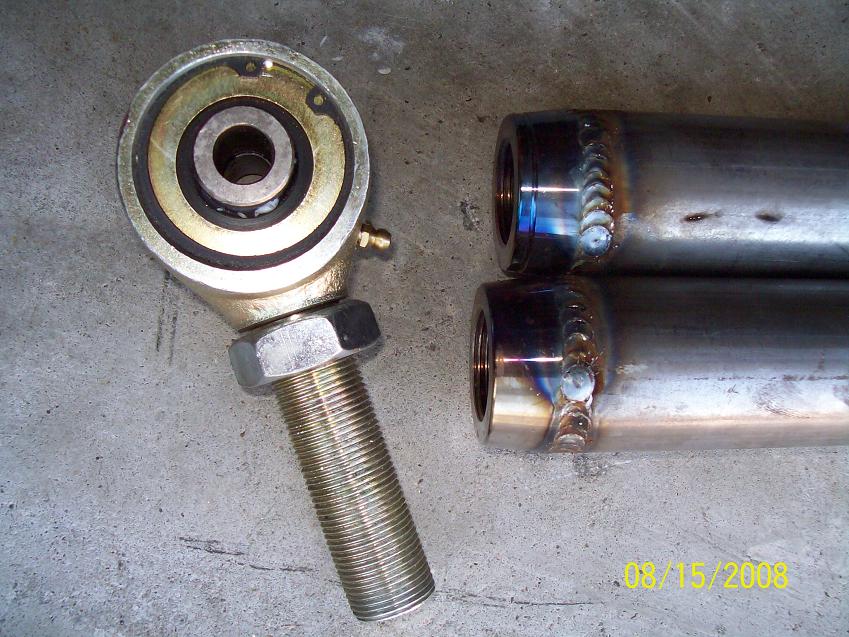
2 1/2" J Johnny joint with jam nut
Made the upper link the similar to lower except with 1.75" 250 wall DOM tube with smaller 2" johnny joints. Its 20 1/4" eye to eye. There is allot adjustment in the Johnny joints. The 2" Johnny Joint uses a 9/16 bolt but has a 1" thread.
Track bar is a .250 wall DOM. About 26.5" long.
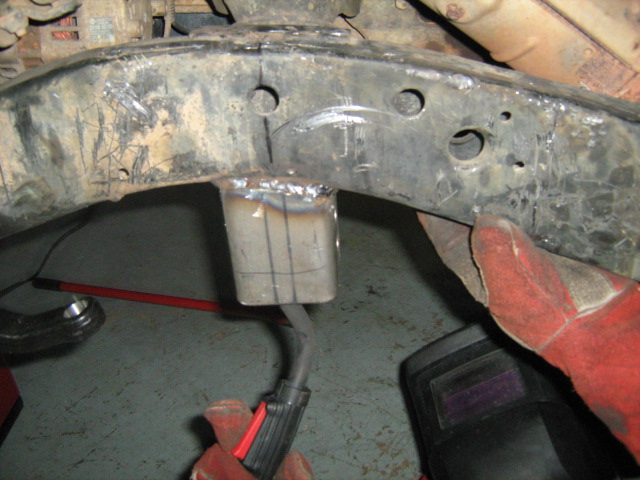
9. SHOCK MOUNTS
The lower mounts are already installed with the axle combo bracket. Removal towers are made from 2x2" .120 wall tube. The mount is 2" ID .250 wall. I remove one side of the tube after drilling the 2 1/2" holes. Then weld to frame.
10. STEERING
11. FRONT BRAKES
For front brake lines I bought these
from Summitracing.com
24" long 10mm to 10mm. Nissan and Dana 44 axles (gm/jeep calipers) use
10mm.1980+ are all 10mm. Just like Nissan. If You already have longer
aftermarket brake lines they will work.
Part # Item Price Qty Price
EAR-63010124ERL -3 ST./ST. 24" HOSE $12.88 2ea $25.76
EAR-989545ERL BRAKE ADAPTER -3 TO 10MM F I.F $4.99 2ea $9.98
EAR-997631ERL BANJO -3 TO 10MM $7.39 2ea $14.78
Parts Total: $50.52
I had to relocate the hard line because it made it hard to get the bolts in the shock tower.
To install the rotors, they are connected to hub via wheel studs. Install rear bearing, wheel seal, rotor then new wheel studs.
12. FRONT DRIVESHAFT
13. TRANS CROSS MEMBER
See SOA page for details.
14. EXHAUST MOD.
15. SWAY BAR
16. REAR SUSPENSION
Sring over axle (Crew cabs use a SUA)
17. Material List
Part and service Suppliers.
Poly Performace - Link frame brackets, Trark bar brackets, poly link ends