![]()
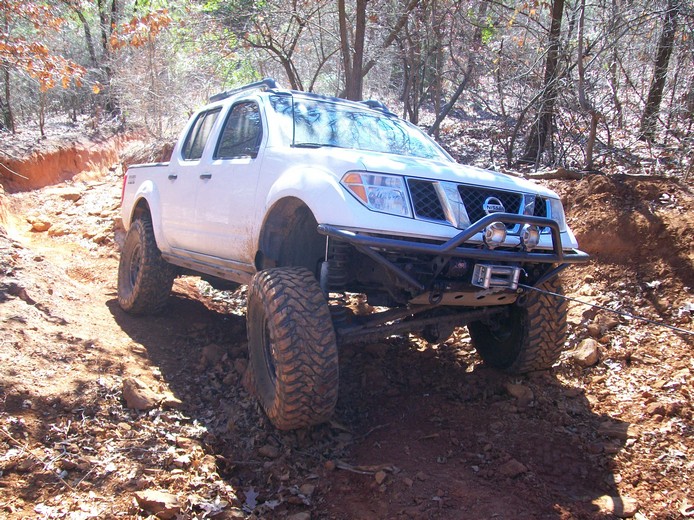
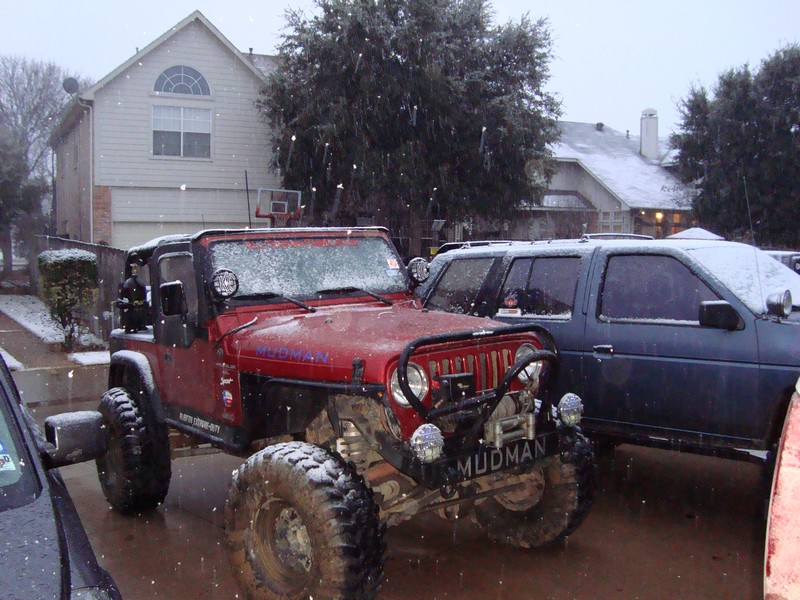
Nissan Frontier (D40) Solid Axle Swap (SAS) with 3 link + Panhard with coil springs.
Warning small pictures and large just click on a picture for the bigger one. (updated 3/9/2011)
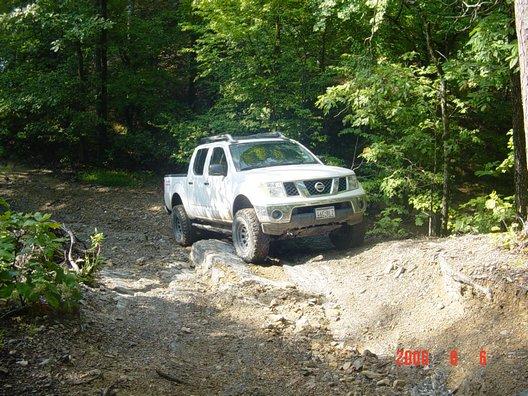
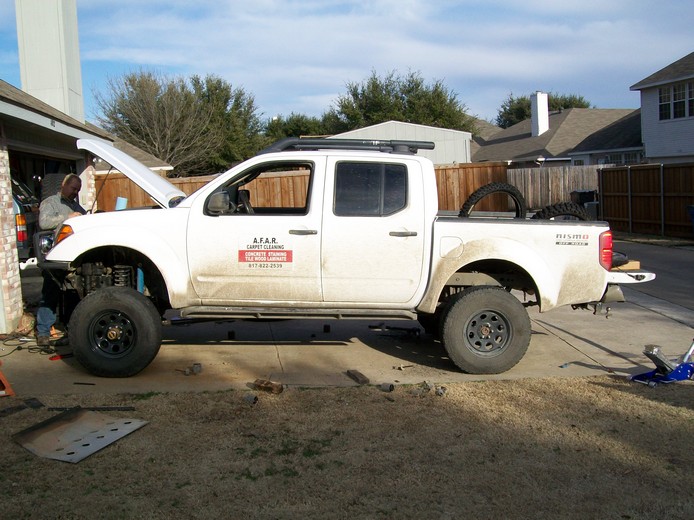
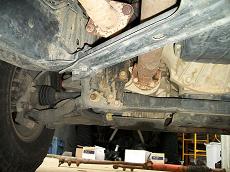
Goal is too build this D40 into the best off road vehicle while still keeping it road worthy and street legal. I listed all the parts used and where I got them to help others. Material list has most of the prices and part numbers used. Started with a 150k mile company work truck. This Frontier has been a family vehicle, work truck and trail rig since owner bought it new in 05. It had a 3" body lift and 2" suspension when we started the upgrade to solid axle. Owner has 2 sets of rims and tires. One for the trail and one for the street.
Plan is the best suspension for trail riding the Nissan Frontier D40 (2005+)
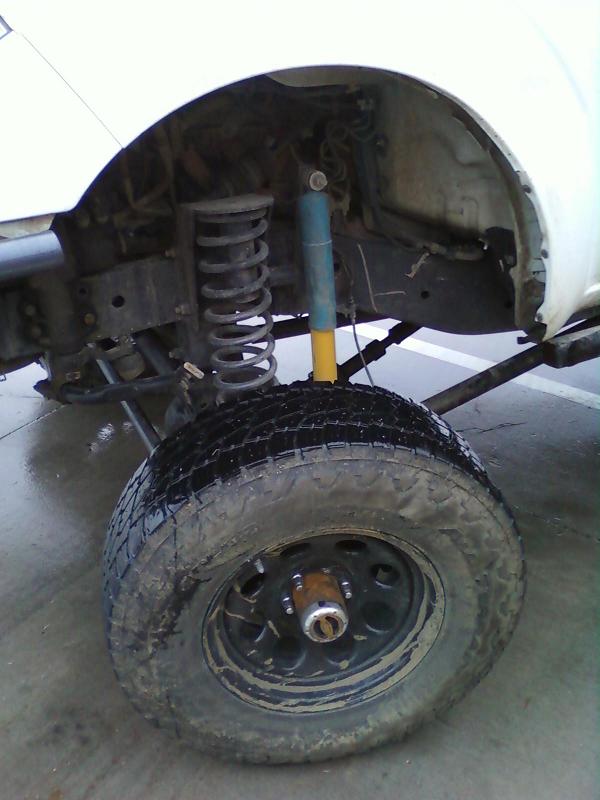
 Lifted IFS with 33s.
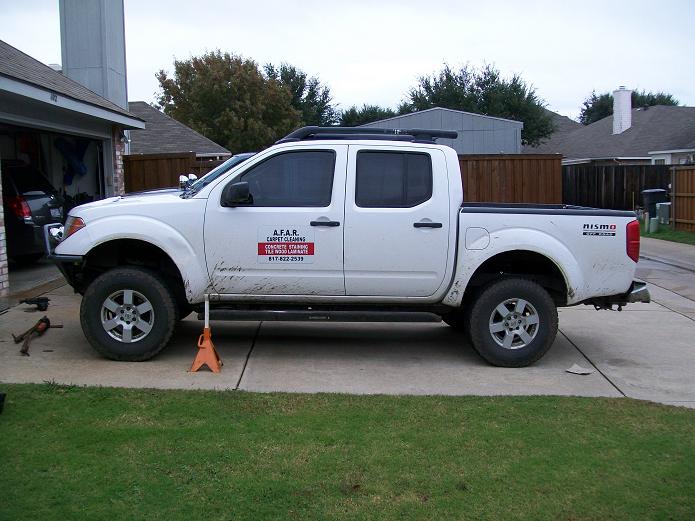
2wd done 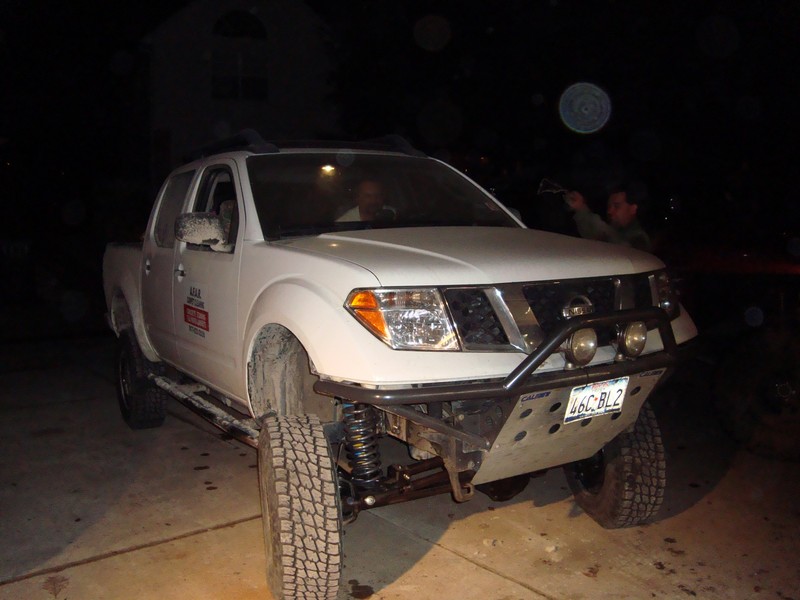 2wd
more height
2wd
more height 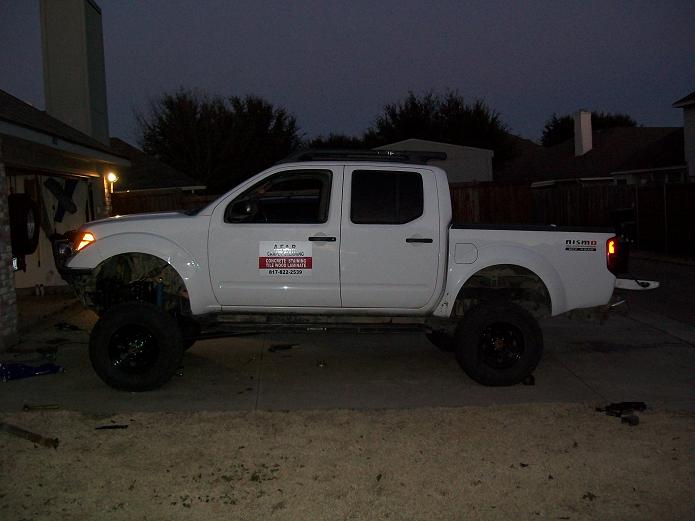
3" BL off, and rear lifted.
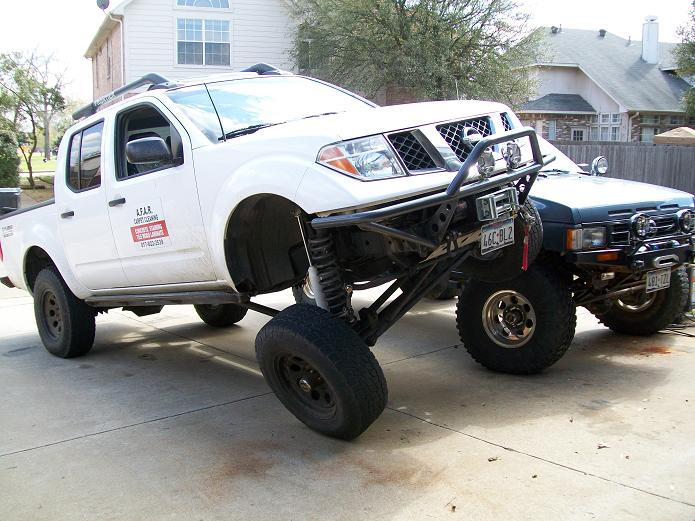
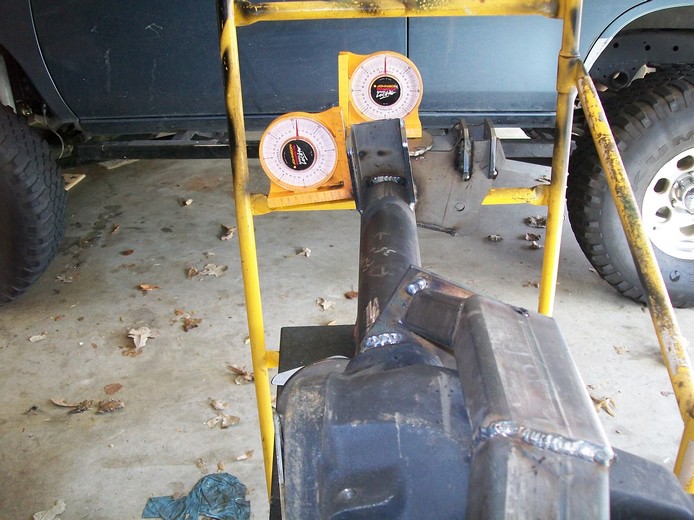
Flex tests. (Need to get some better pix)

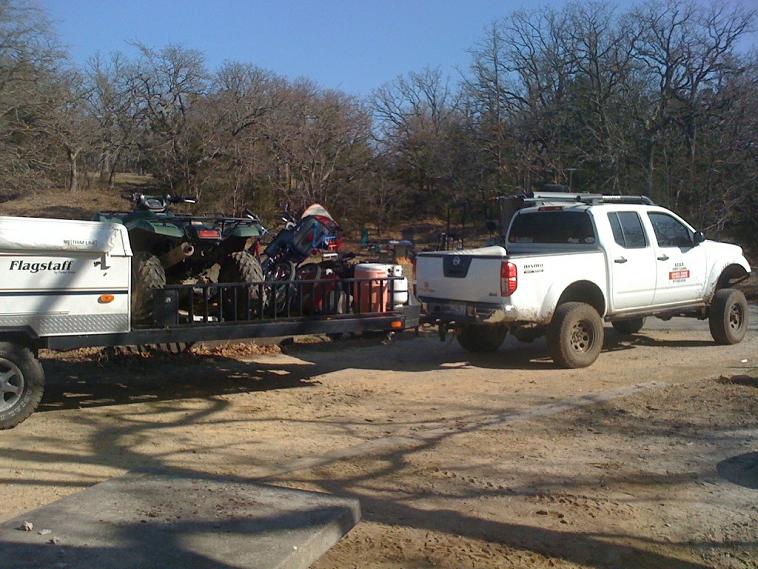
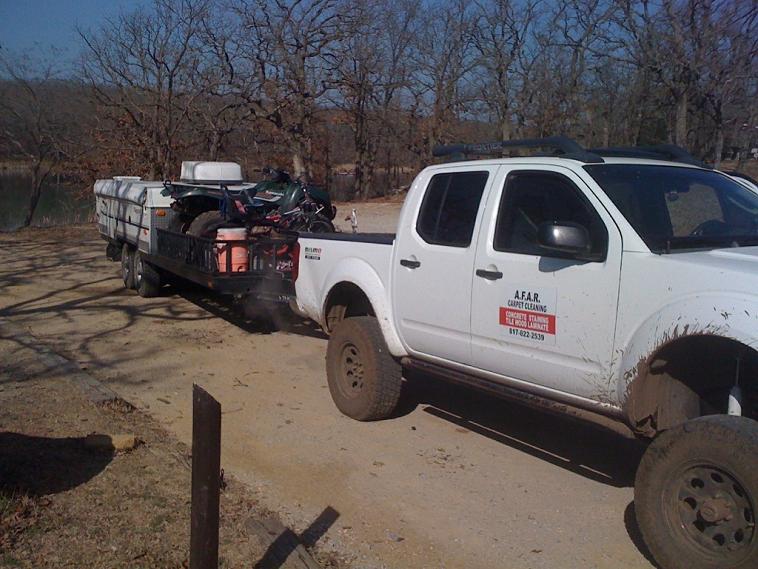
One of the 3 trailers he tows.
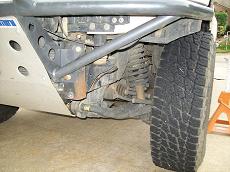
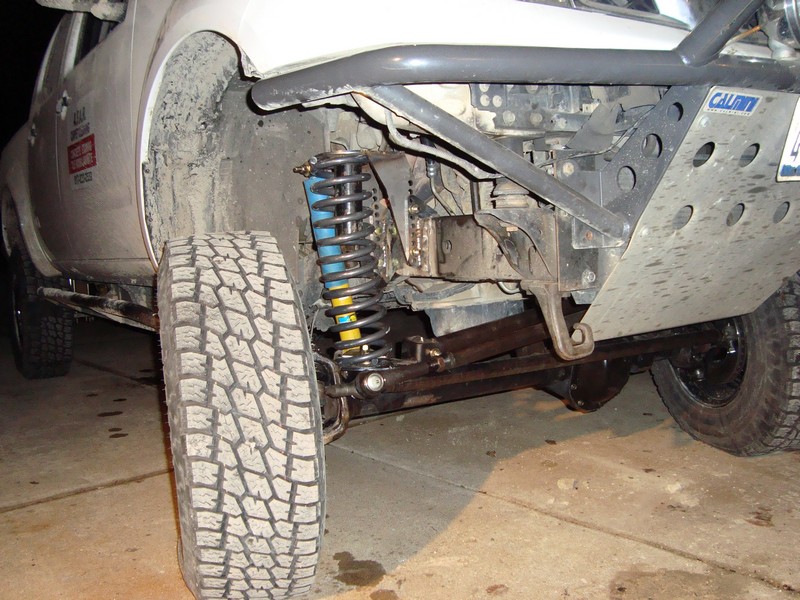
New 38x14.50s and 4.10 gears. Stock is 2.6
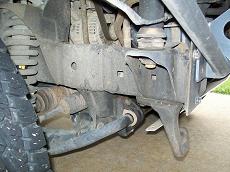
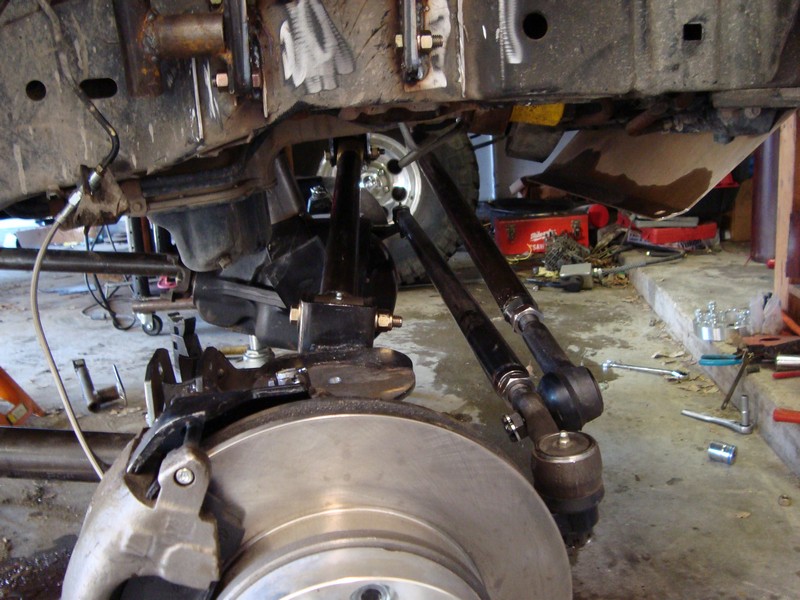
Plan 35" tires, 4.10 gears, 3 link. Dana 44 from a waggy wide trac, tone rings reinstalled and oem calipers.
- Cut and turn front axle - remove all and cut remove and install C at correct caster.
- Axle prep - ring and pinion gear and locker install
- Deconstruction - remove all old IFS parts and sell
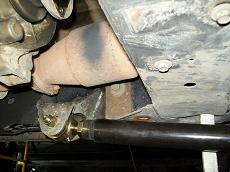
- Lower Link mounts - weld on new mounts to frame and axle
- Upper link mounts - weld on new mount to frame and axle housing.
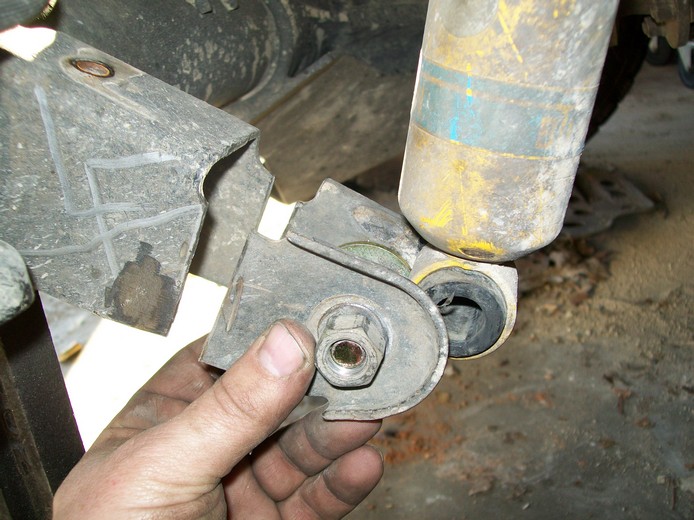
- Track Bar mounts - weld on 2 mounts and one gusset
- Coil buckets - weld on buckets (adjustable and removal for easy engine access).
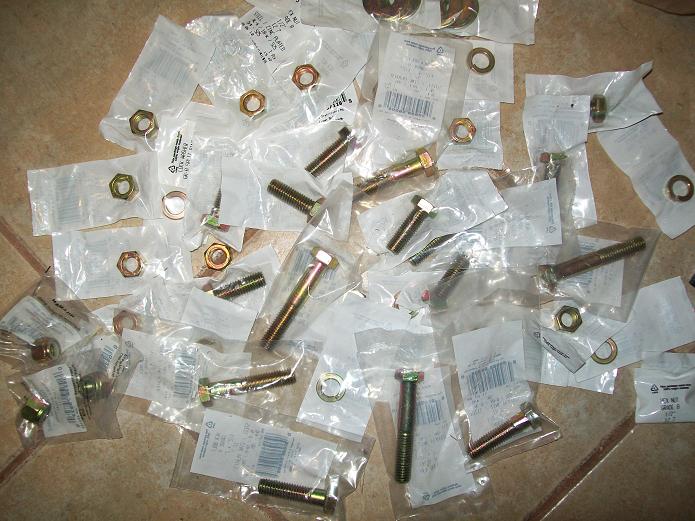
- Links - Make some DOM links with bungs and adjustable Johnny Joints
- Shock Mounts - weld on tabs so there removable for easy engine access.
- Steering - make DOM drag and tie and ream pitman arm.
- Front brakes - install bleed easy.
- Front Driveshaft - more information of the SAS driveshaft page
- Transmission cross member mod
- Sway bar -
- Rear suspension
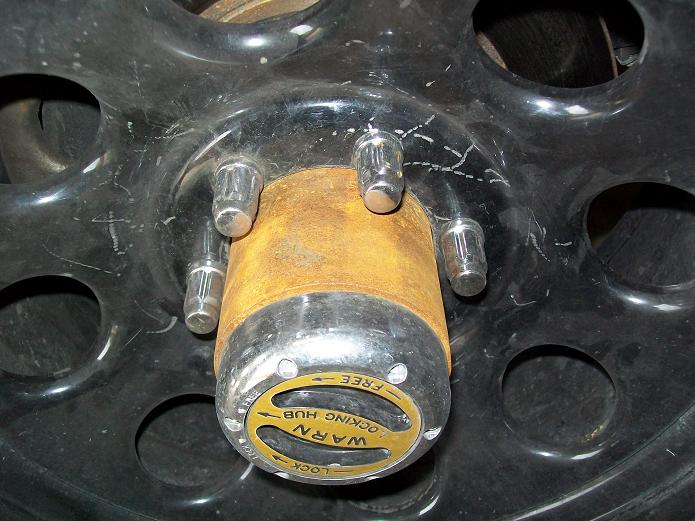
- Adapters / Ream wheels How to convert your axle to 6x4.5
- Tone rings installed

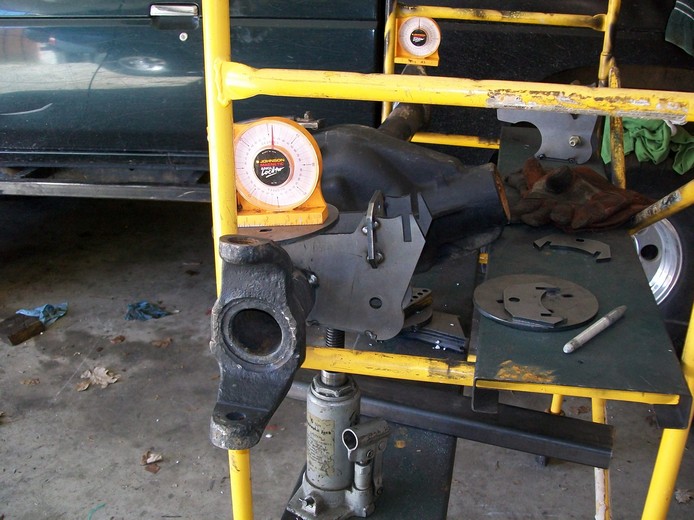
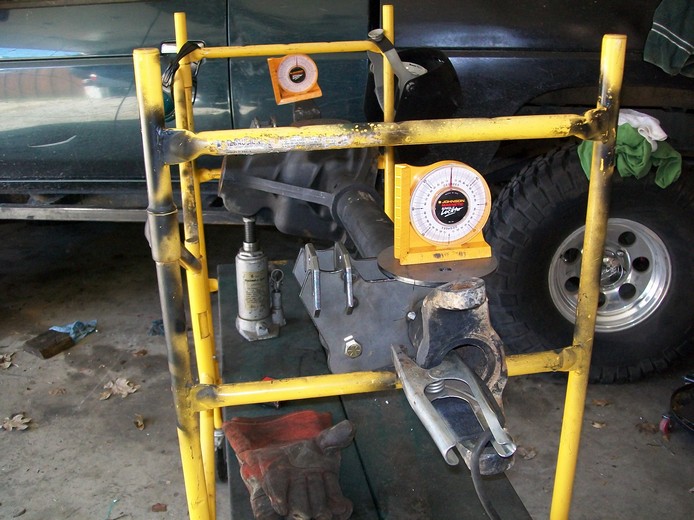
1. CUT and TURN
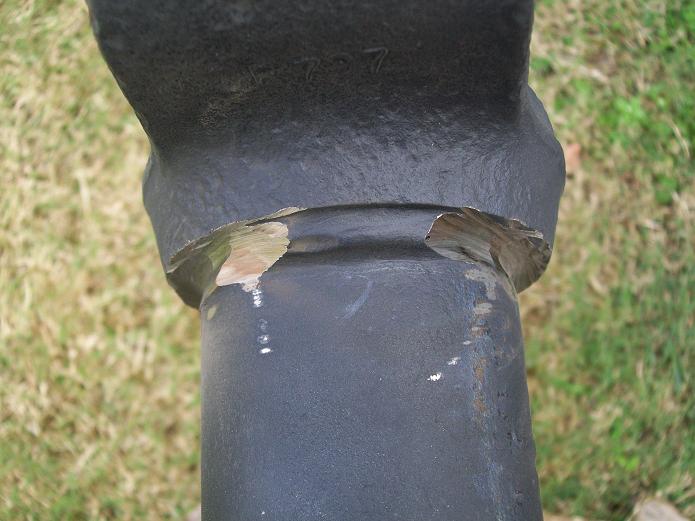
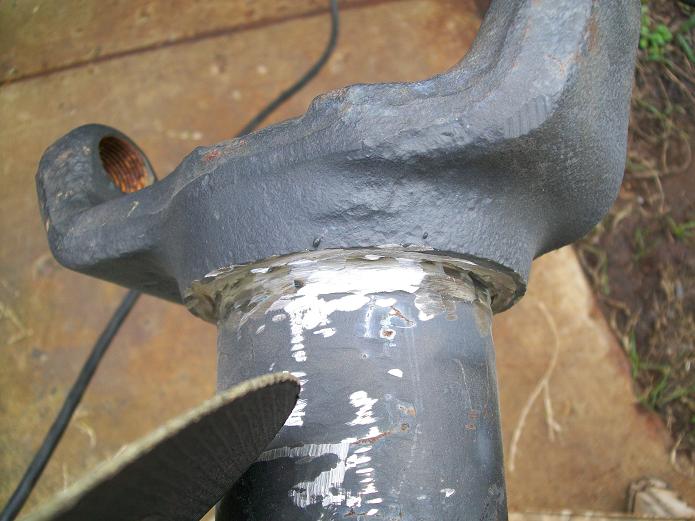
You grind down the weld between the C and the tube. Then using a cut off wheel on a 4.5" angle grinder cut the weld. Then you can pound the Cs off with a sledge hammer. The C is PRESSED on the tube 1 1/4". You have to remove the C to turn it.
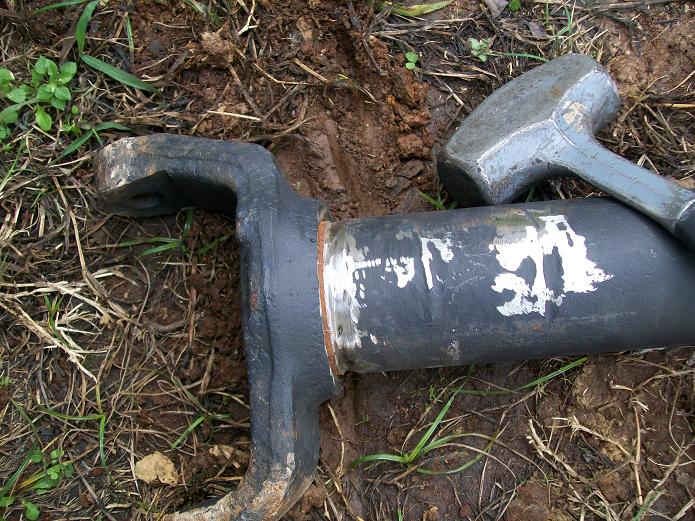
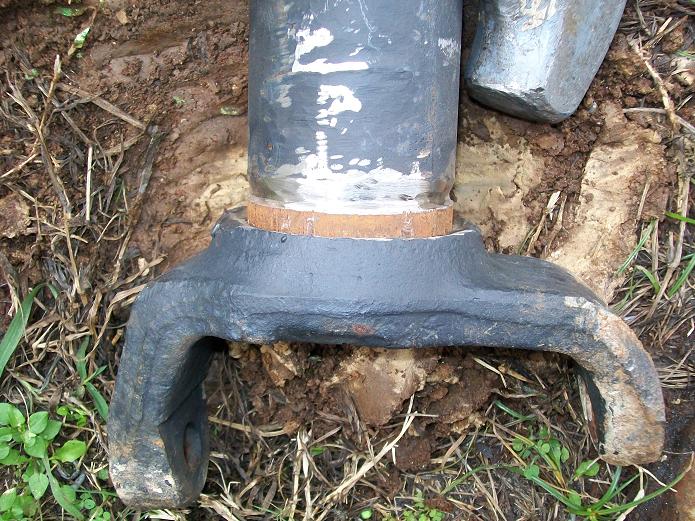
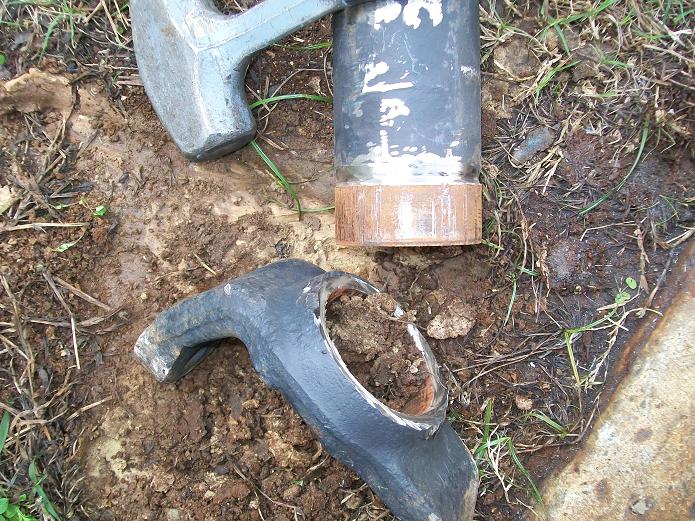
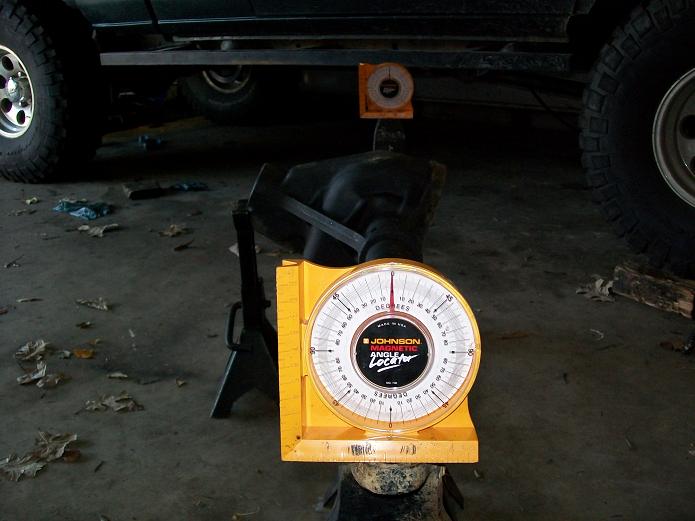
Sand down the tube and apply some grease the pound the C back on. Mock up the axle at pinion angle. 16-28deg pointing at Tcase works best for Nissans. Then welded the Cs back on at 6- 8deg caster at ride height. The C's are forged steel and can be welded with MIG or Flux.
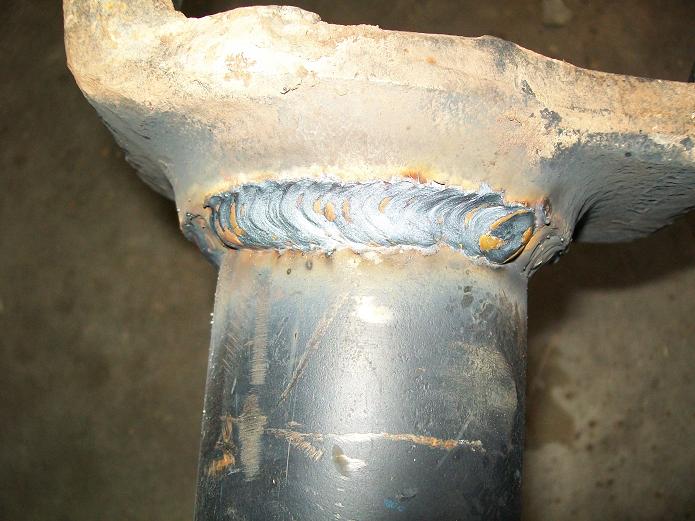
Pumpkin is point up at 16deg and the caster at 8deg..
Now were ready to start a SAS!
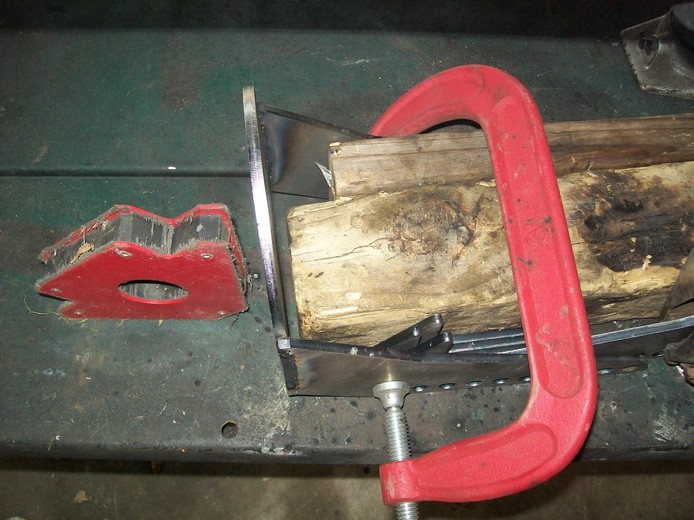
Now add the lower link/coil/shock mounts and upper mount truss. I mounted them 4.25" from tube end.
The upper link truss is the hardest piece.

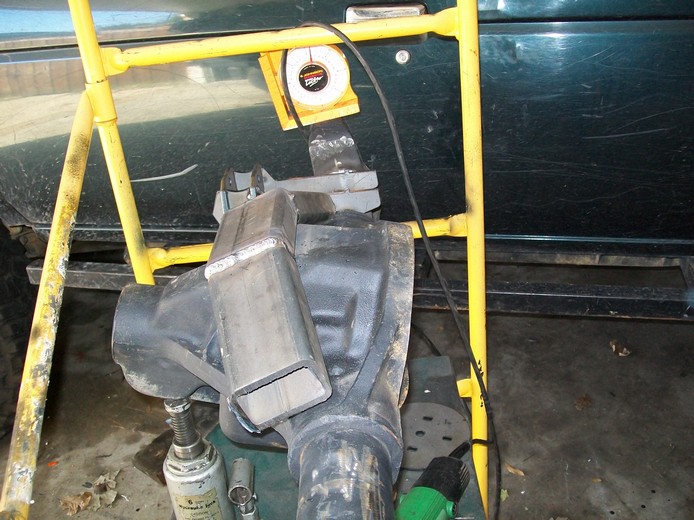
I connect the truss to the link mount before putting on the coil plate. Then weld truss to coil plate instead of pumpkin.
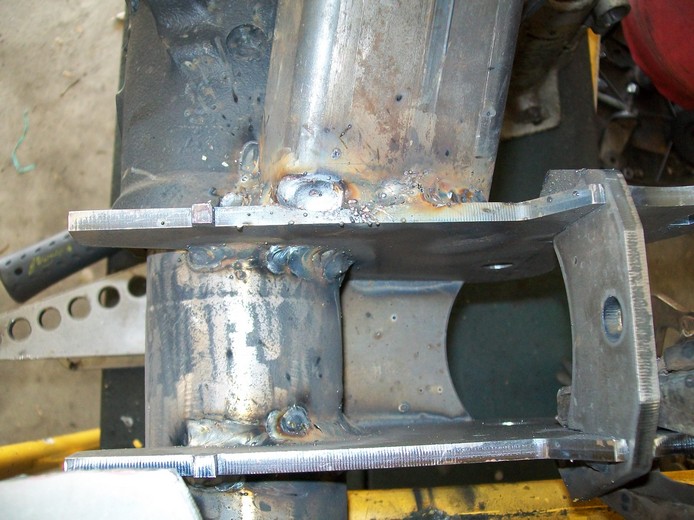
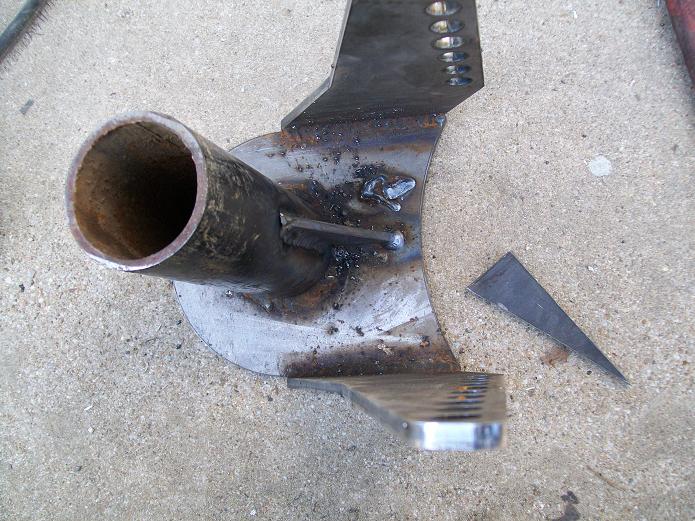
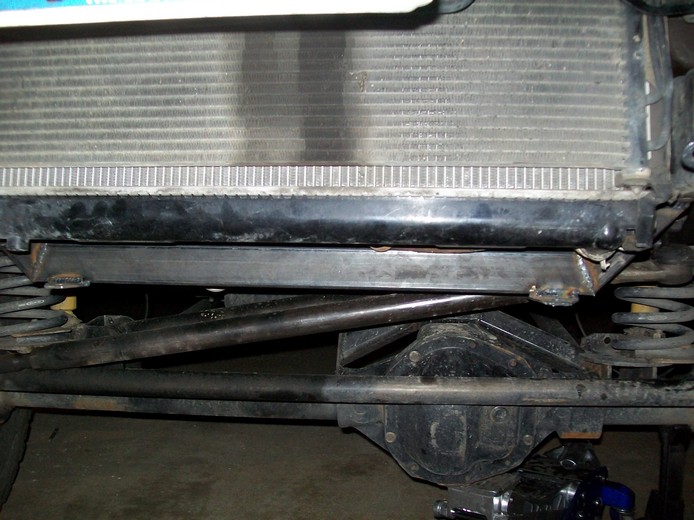
I decided to mount the track bar 10deg leaning forward to help with truss clearance. Installed the track bar axle mount. Cut a 3" radius in the bottom of mount and weld on. Trim 1/2" off the coil mount for correct placement. With coil pad level weld bracket to tube.

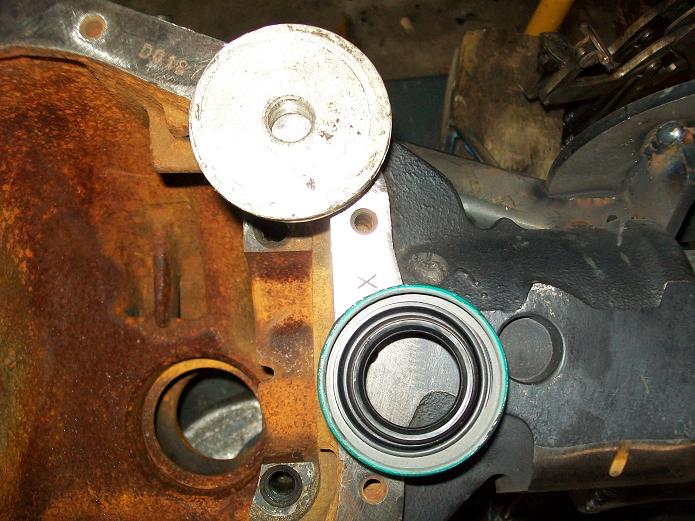
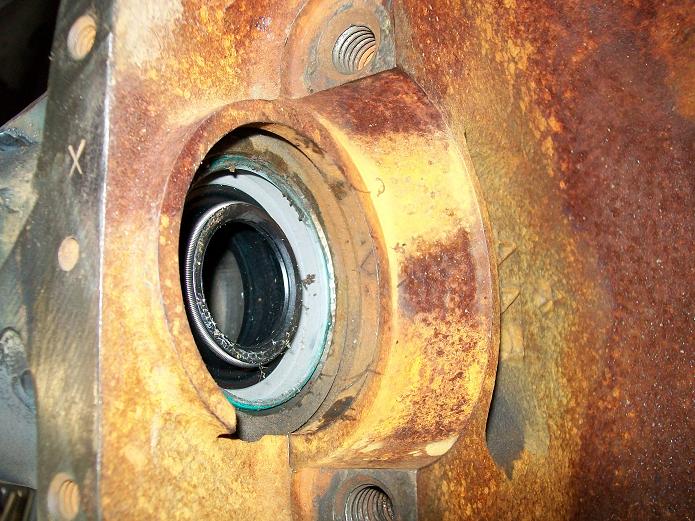
Installed some new axle seals before the gears go in.
After the axle was centered under frame. The 1.5" farther inward compared to d21/d22. It required the coil mount to be relocated outward. So I used the coil retainers.
2. Front Dana 44 Axle prep
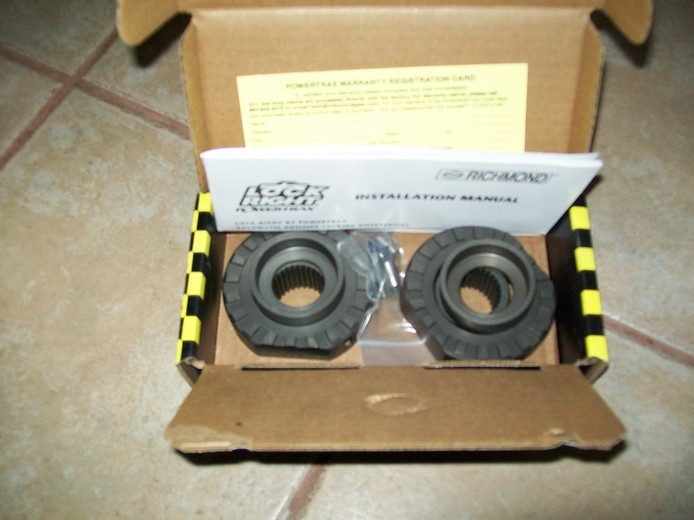
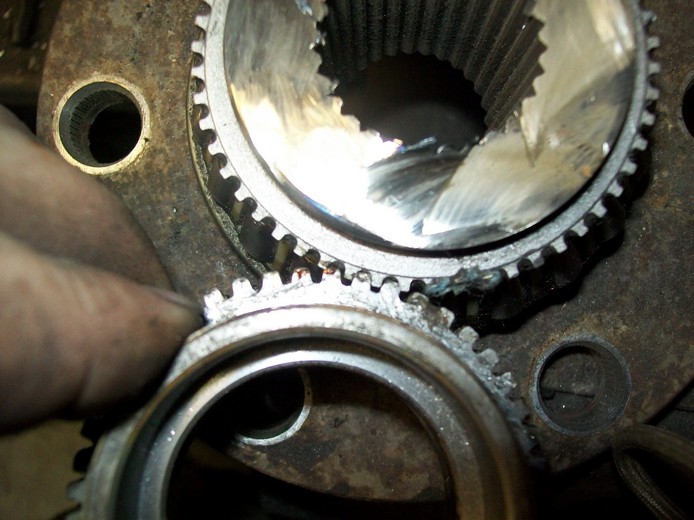
Install your new gears and locker. A new carrier is needed for 3.92 and lower gears. Found a used 4.10 gears on a carrier. I installed a Powertraxx lock right in it also.
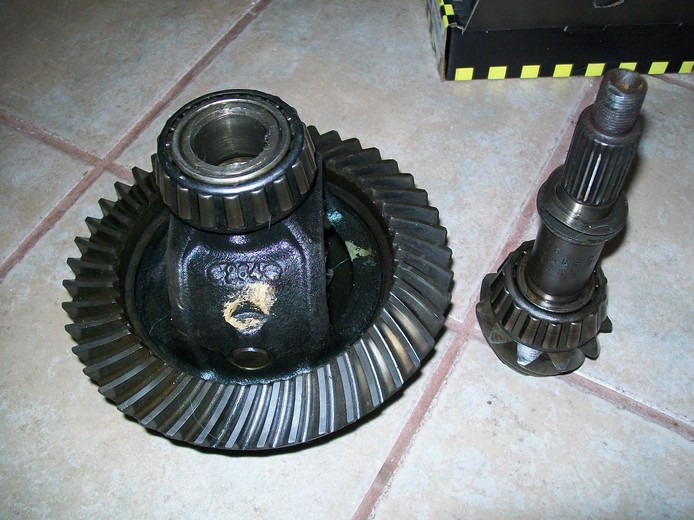
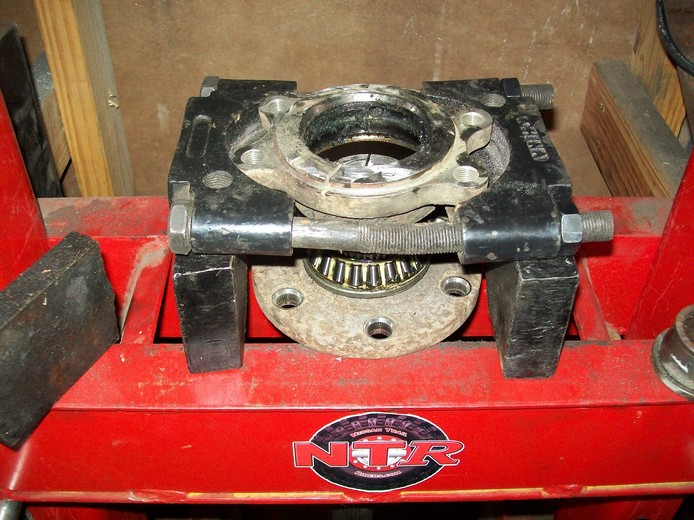
First step press off old bearings and discard. I finally modified 2 cheap pullers and drilled a hole in a bolt and make a great side bearing puller. Works great.
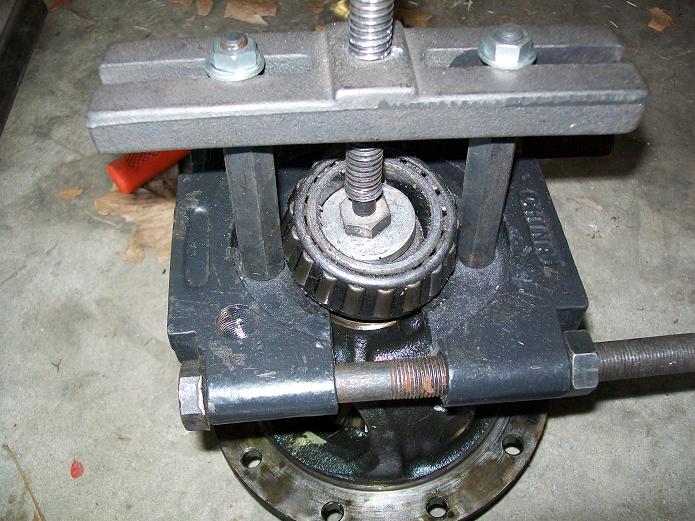
Relocated the oil hole for more oil since the cut and turn lowers the hole.

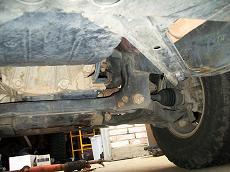
3. DECONSTRUCTION
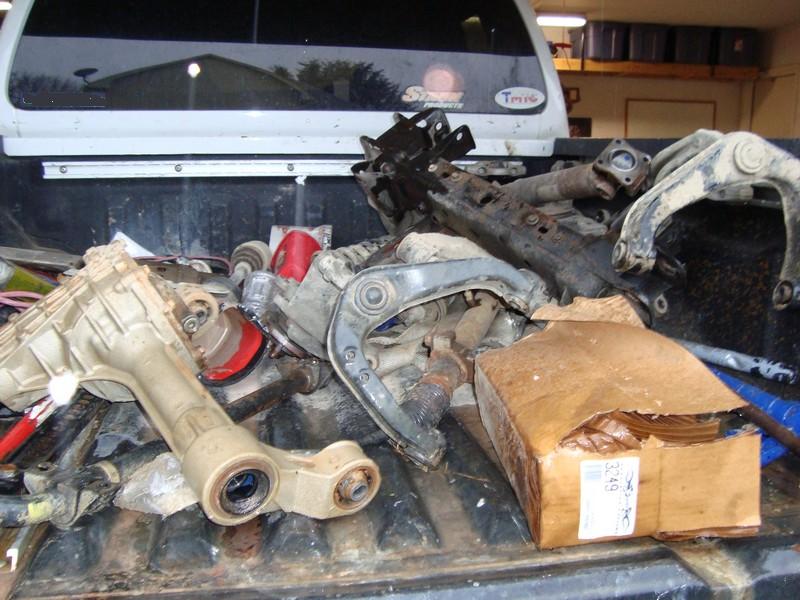
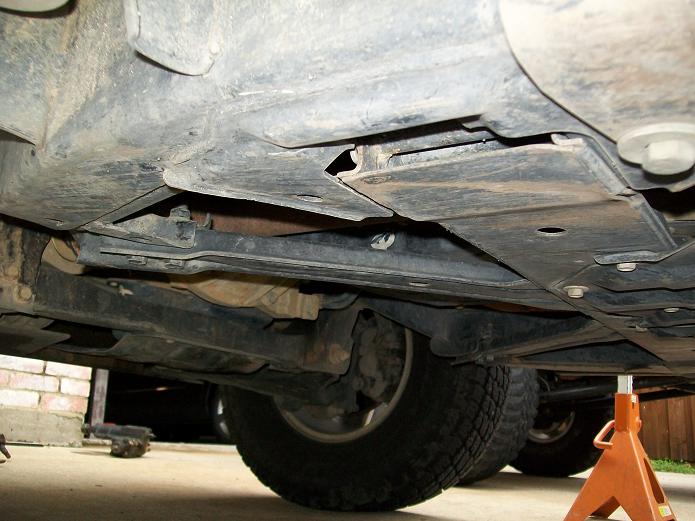
Strip the frame down. Removed tires, calipers, sway bar, steering hubs, rotors, UCAs, shocks, cv axles, 3rd member, LCAs, cross member and rubber brake lines.
Cut off all IFS brackets. Plasma and Sawzall work best. But also used cut off wheel in a grinder is faster if it fits.
Before with 2" lift coils and after with all items unbolted.
Not cut off the old mounts. These come off real easy compared to the w/d21 and w/d22. sawzall and cut off wheel is all that is needed.

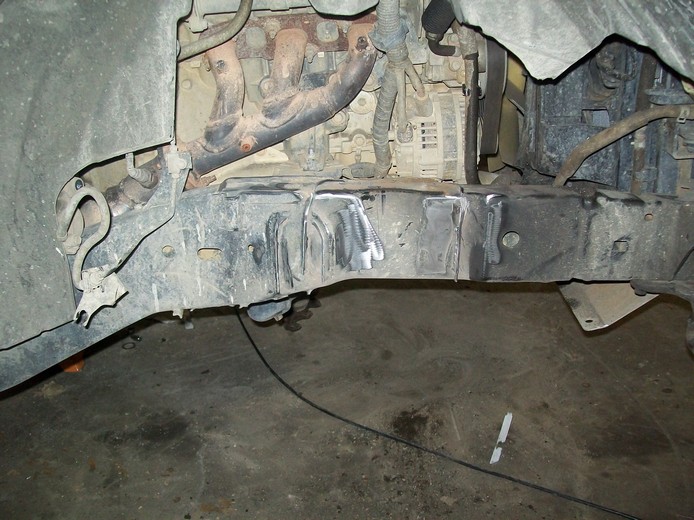
Lots of good parts to sell.
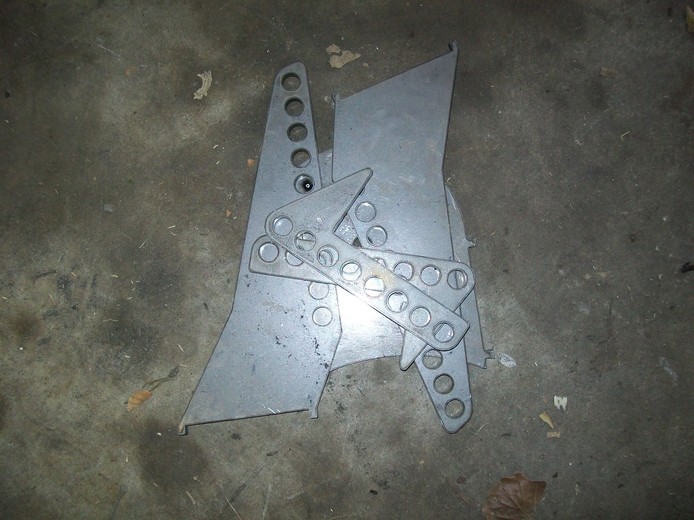
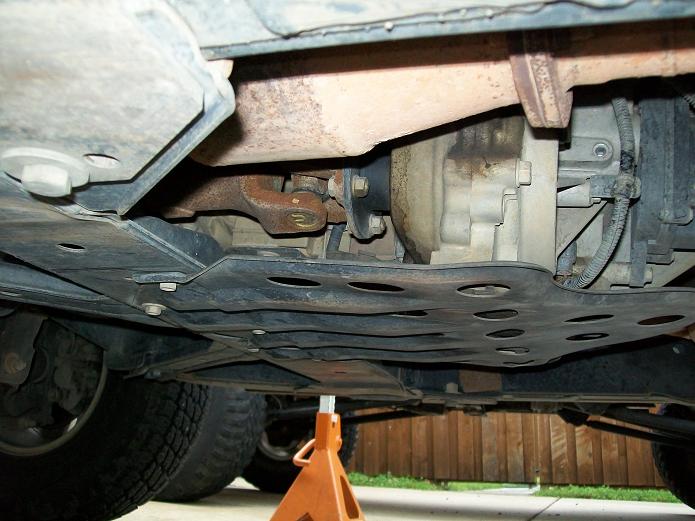
4. Lower LINK MOUNTS
Frame link mounts. There is a perfect place on the frame rail were the frame is 1/4 thick. Its double wall 1/8. I decided to use mounts to get them up high and to the side of the frame. They need to be inward of the frame rail for tire clearance. This allows EASY removal of trans/tcase combo in future as needed.
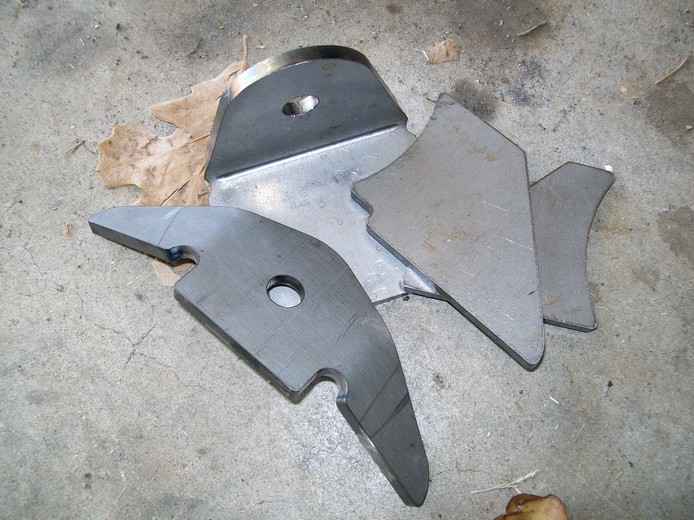
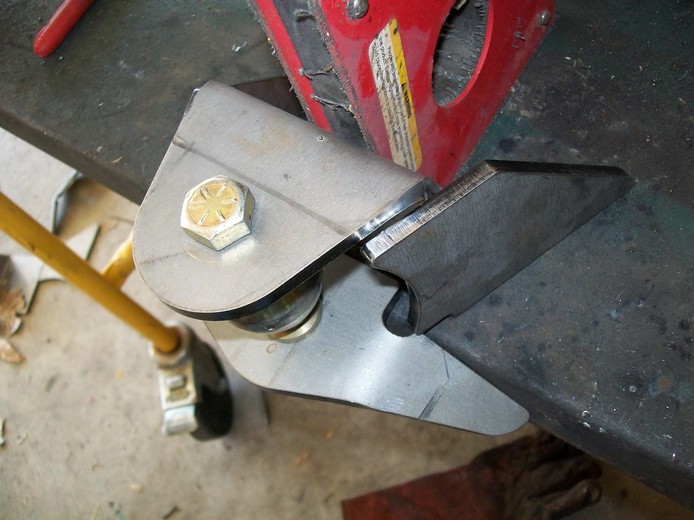
Installed. I still love these mounts. We had to cut off a piece off the slider mount for clearance. These are mounted right behind trans/tcase cross member.
5. UPPER LINK MOUNTS
I decided to use a new Upper link frame mount this time. It caused issues with alignment. I hoped it would save time not going through the frame. Ended up taking longer because its hard to weld in.

I had to cut the JJoint collar off and weld on at an angle to compensate.

Upper link frame mount. I made a spacer for the 6" bolt that goes through the frame. I mounted the link mount to a piece of 3/16 plate frame height and 8" long. Welded to inside frame rail in front of trans mount. I then added some gusset to outside frame rail. The Nissan inner frame rail is thicker than the outer.
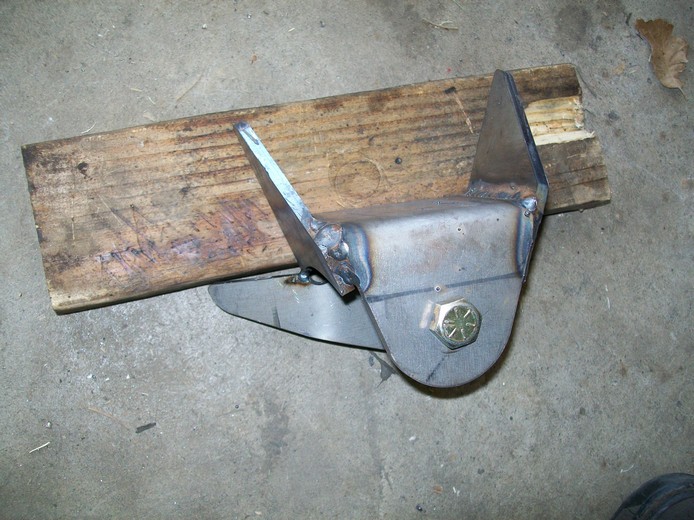
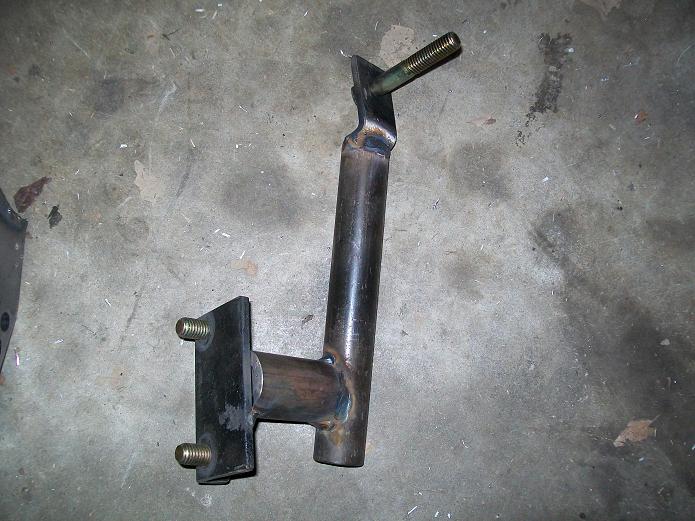
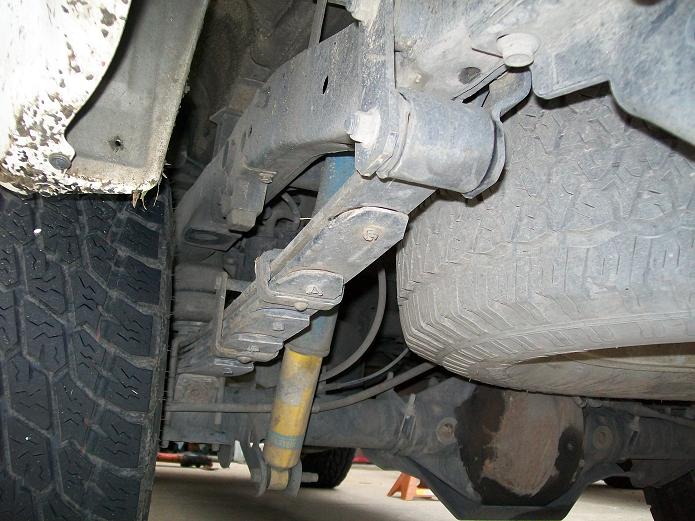
6. Track bar mounts
Mark the frame were you want the center of the axle. I mount the coil bucket here. This time I mounted the track bar frame mount forward more.
Axle side is the last mount to install.
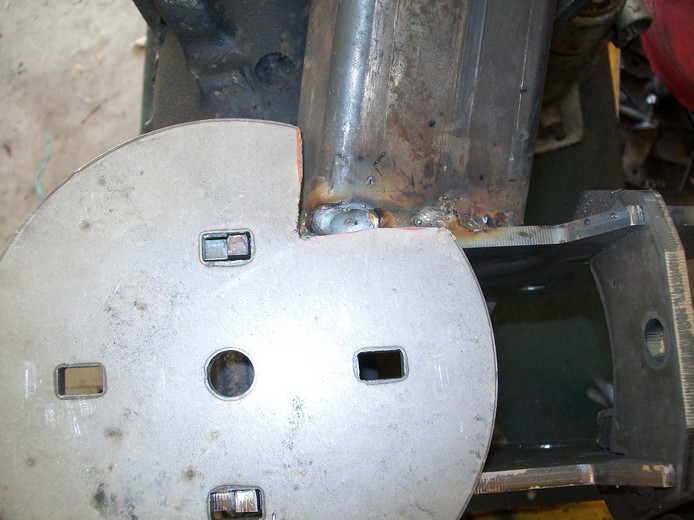
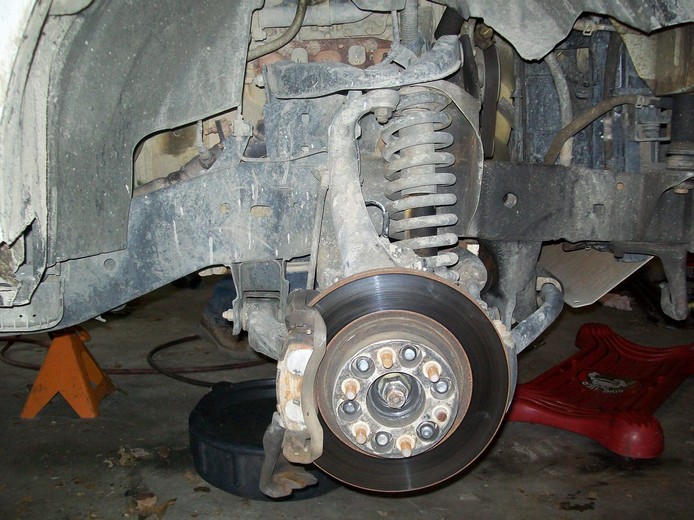
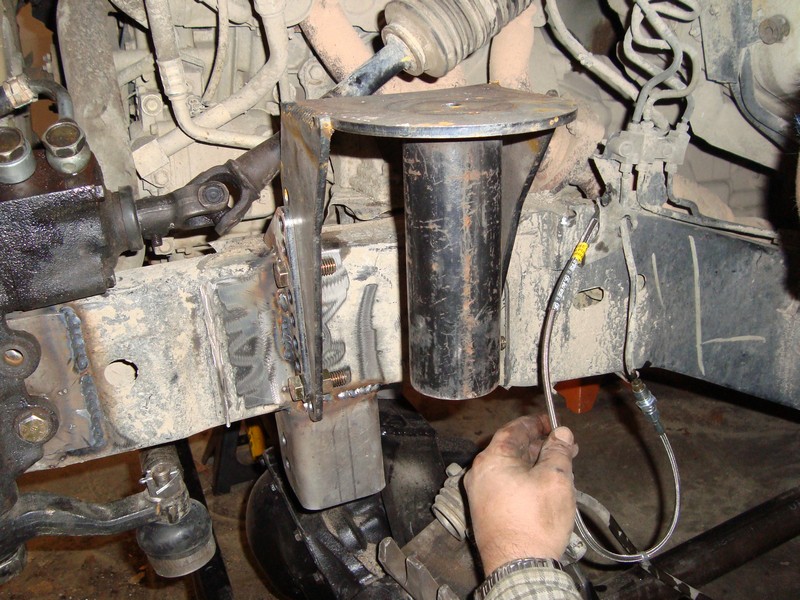
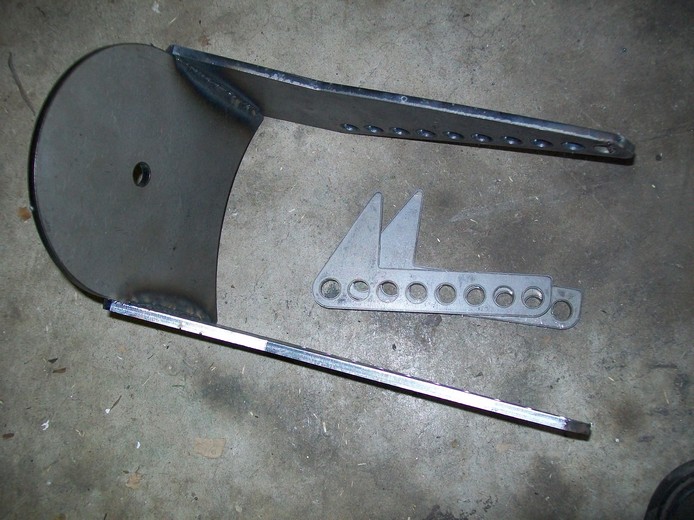
7. COIL BUCKETS
Weld the 3 piece coil buckets together on a bench. Try to keep the sides square as possible. Then bolt on tabs with 1/2" bolts and weld to frame. The coil bucket goes in the axle center line. Basically center of track bar mount. I measure from the front body mount.
The coil bucket should be about XXX from the upper steering box bolt center.
I added 7" of tube to prevent the coil from falling out at full droop.
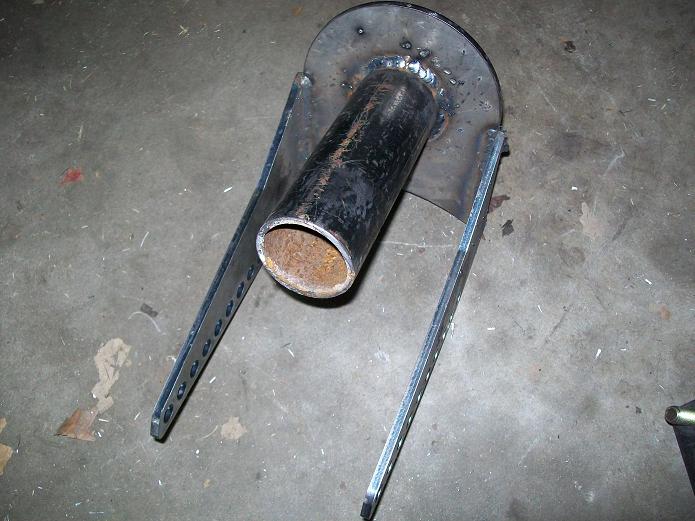
Need to add a piece of steel to "locate" the coil on the bucket. The coil buckets are designed for retained coils. Which I do not like.
Update 1/5/2010 The coil locaters are now added. Also the tube was angled for clearance.
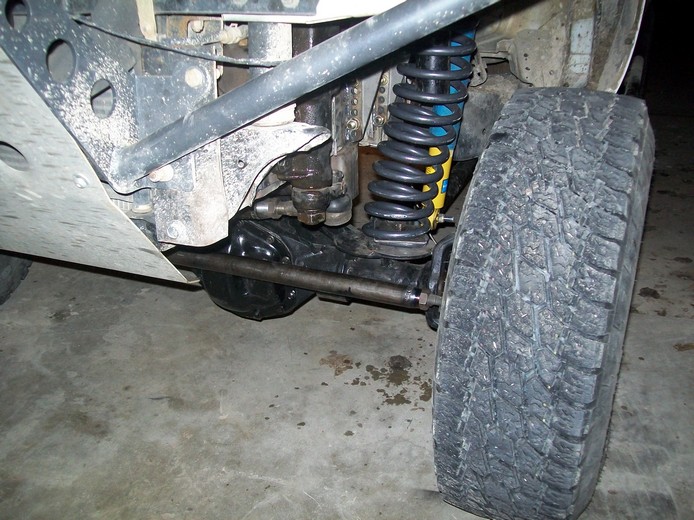
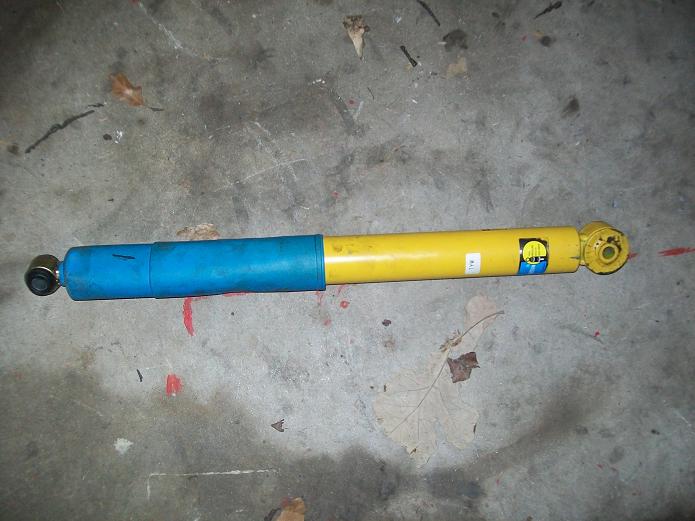
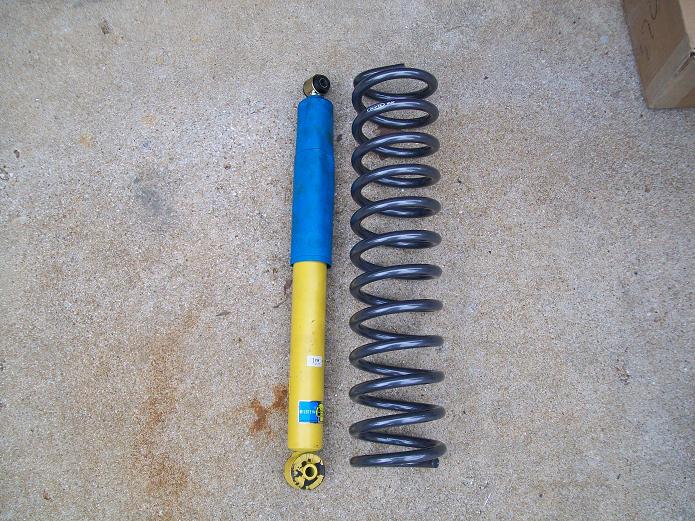
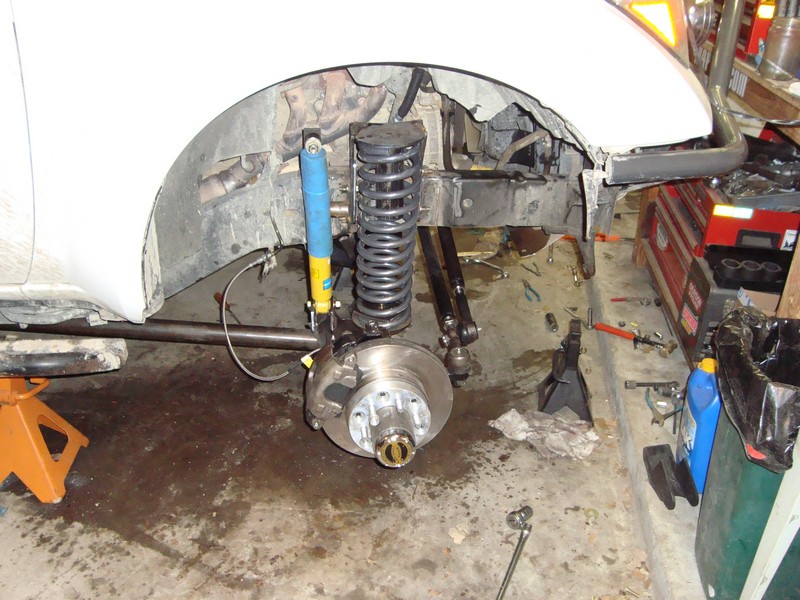
The 5.5 lift springs and bilstein shocks.
A couple of 1/2" bolts to hold it all on.
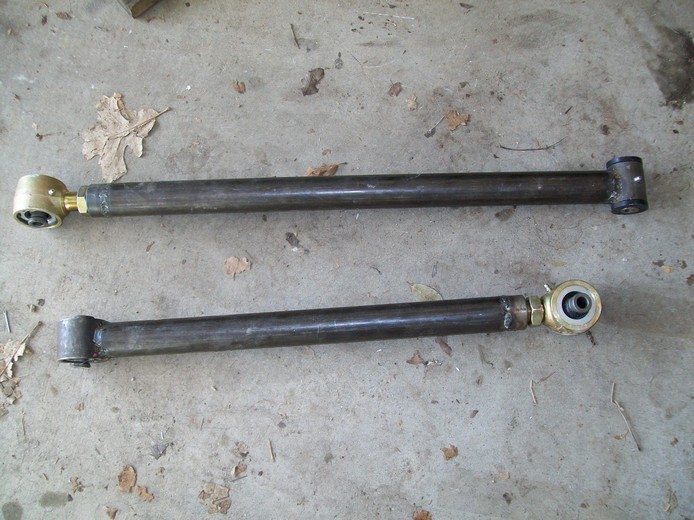
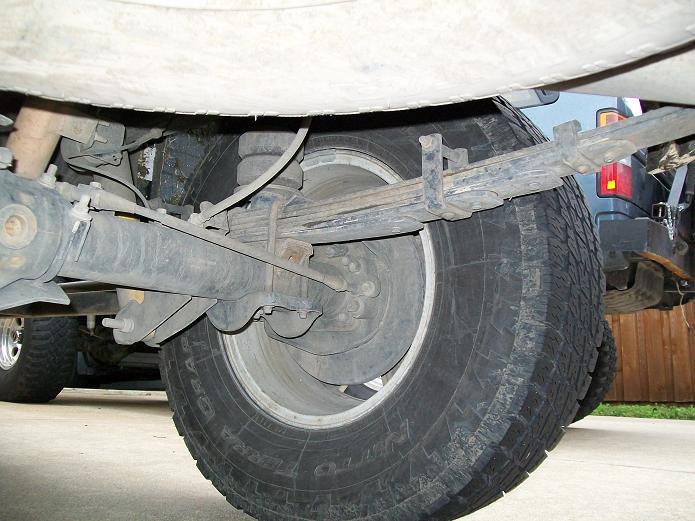
8. LINKS
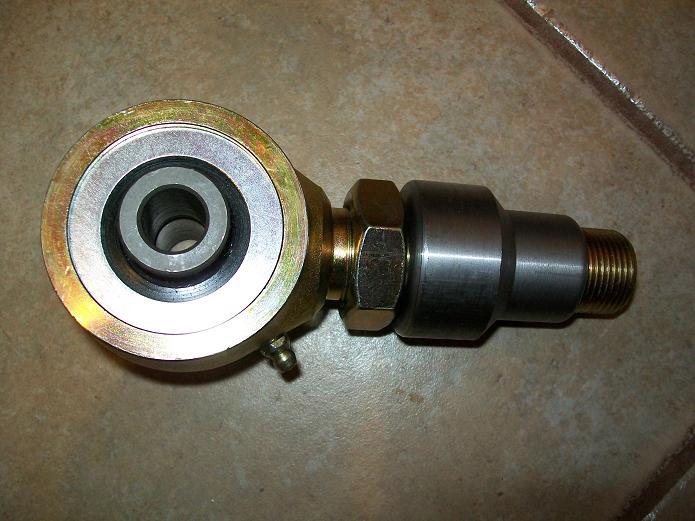
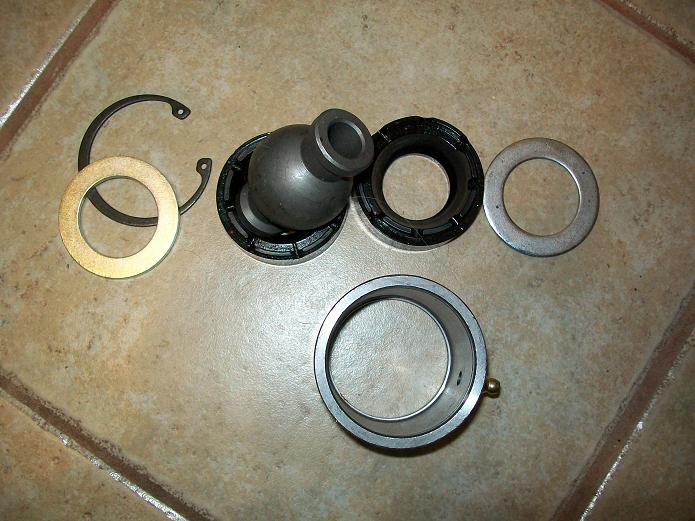

2.5" J Johnny joint with jam nut and bung. Non adjustable 2.5" now with grease fittings. The internals are the same. 2 5/8 mounting size. 9/16 bolt.

Made the upper link the similar to lower except with 1.75" 250 wall DOM tube with same johnny joints. Its XXX eye to eye. There is allot adjustment in the Johnny joints.
Track bar is a .250 wall DOM. About xxx long.
9. SHOCK MOUNTS
The lower mounts are already installed with the axle combo bracket. The upper is a removal adjustable tower that connects to the Coil tower.
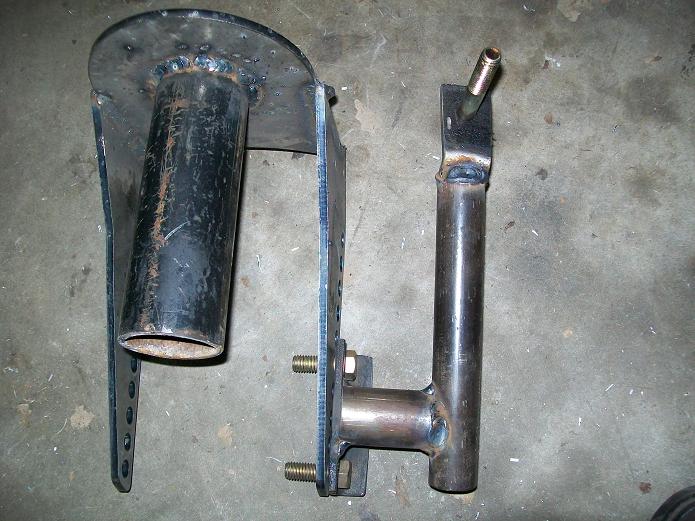
installed. The shock towers came out perfect. But dont line up with the inward lowers. So the lowers will be moved.

Finished pix. No paint yet since it was snowing.
Update 1/5/2010 the shocks have been relocated out 2" at the bottom mount.
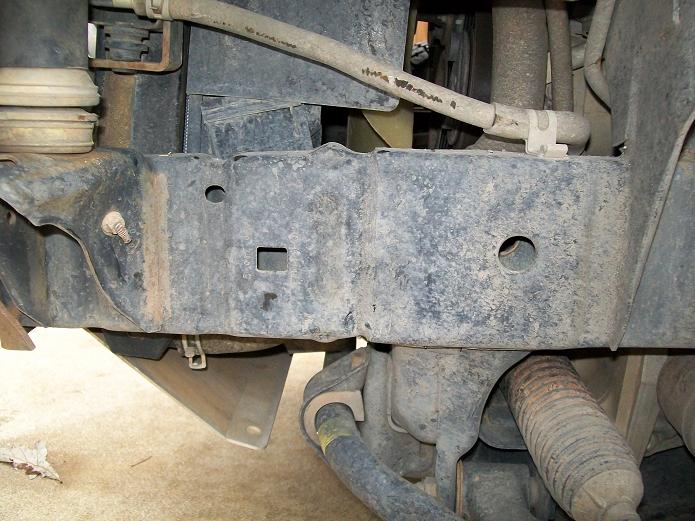
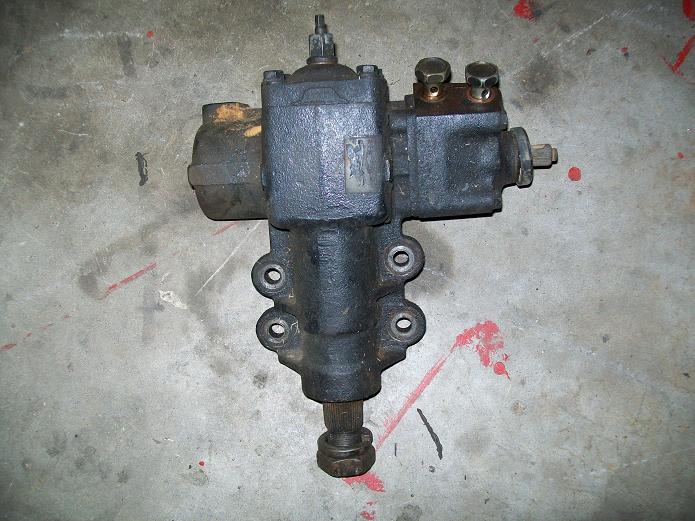
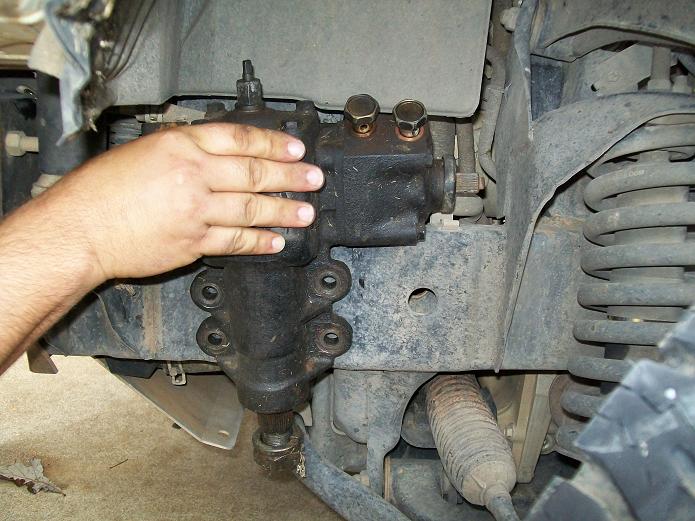
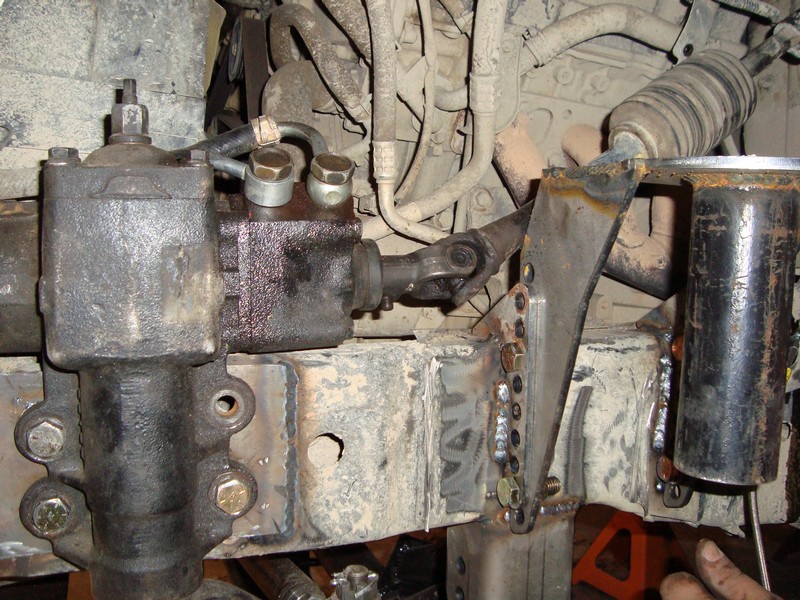
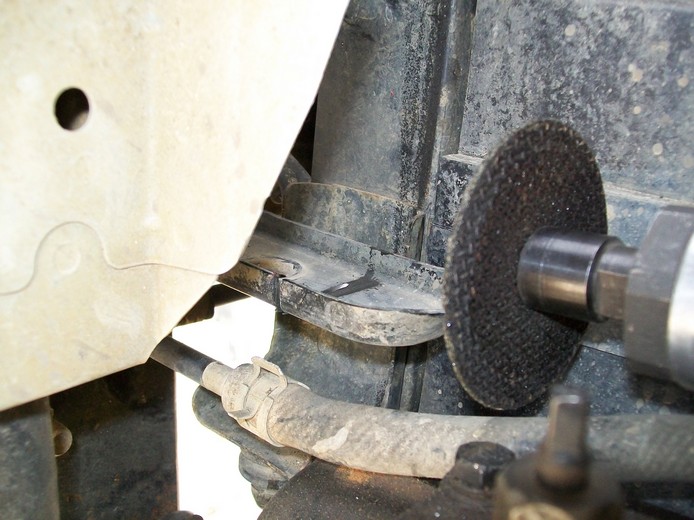
10. STEERING
The D40 is rack and pinion. So need to add a steering box. The D21 box fits perfect on the frame. I had to enlarge the 12mm holes to 1/2 for the new bolts.
used a D21 shaft and the D40 shaft. This is the D21 shaft. I use the box end only.
The d40 shaft does slide on the box but the angle is wrong and there is no U joint at the box.
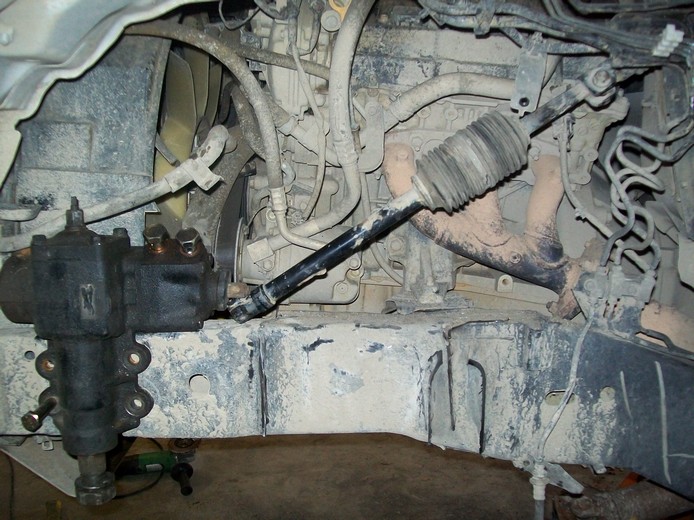
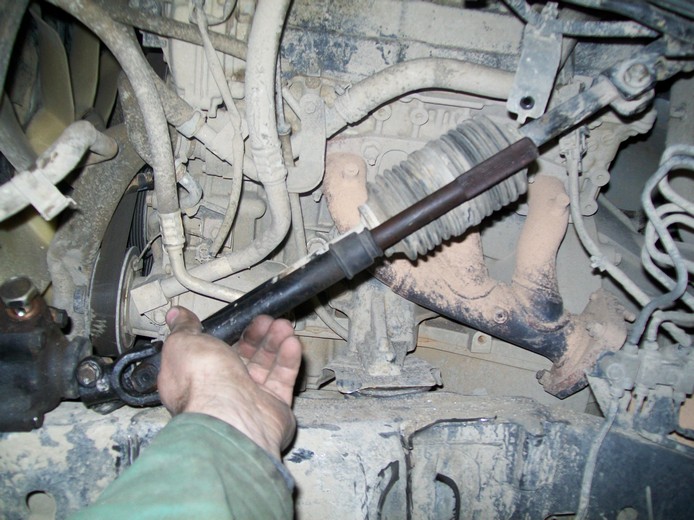
They are the same OD different ID so I used the d21 splined shaft as a gusset.

Shaft done.
I added some 1/2" .120 wall sleeves on the holes and a 3/16" flat stock. The frame is not flat where the box goes. Be careful not to drill into the radiator hose on other side. Used a D21 pitman reamed from the bottom for the GM tre. Just clears the frame perfectly.
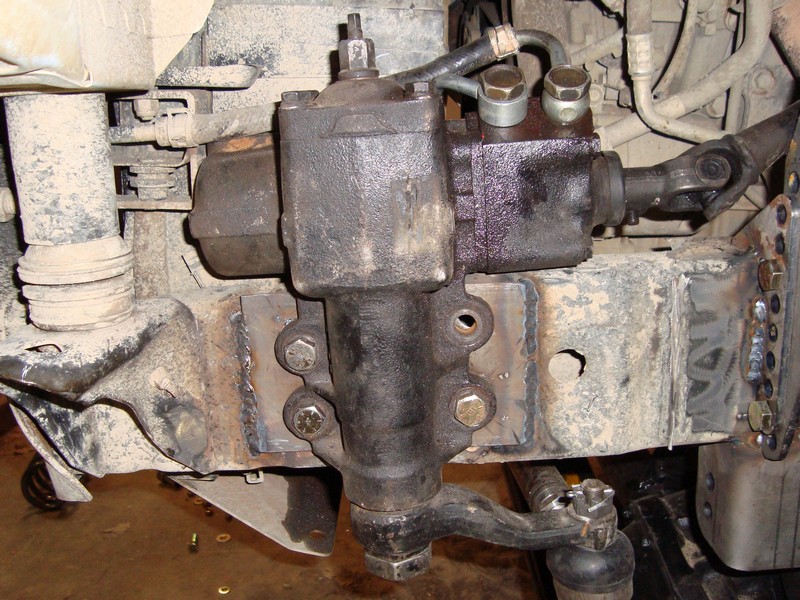
Update. We removed the 3" body lift AFTER the SAS. So we had to trim the radiator tab on the core support to lower the body. This was a planned cut. We put the steering box slightly farther forward of a stock d21 box.
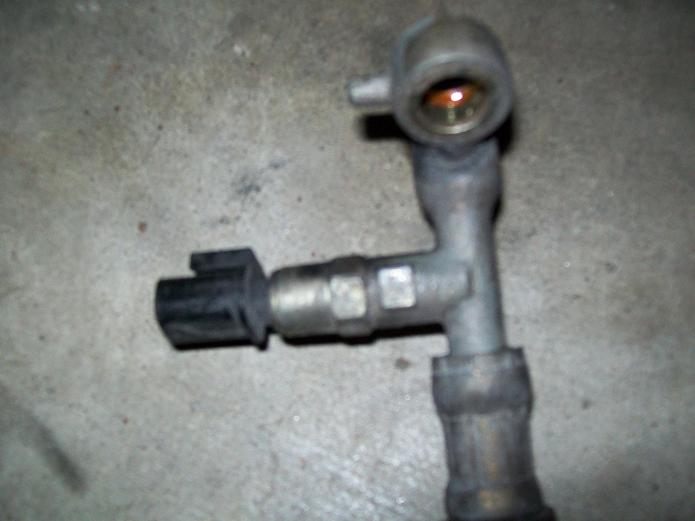
We used a D21 high pressure line and part of the low pressure line. The D40 pressure switch fits the D21 hose. But the wires are too short to plugin. May be able to bend the hardline to fit. This is the D21 parts.
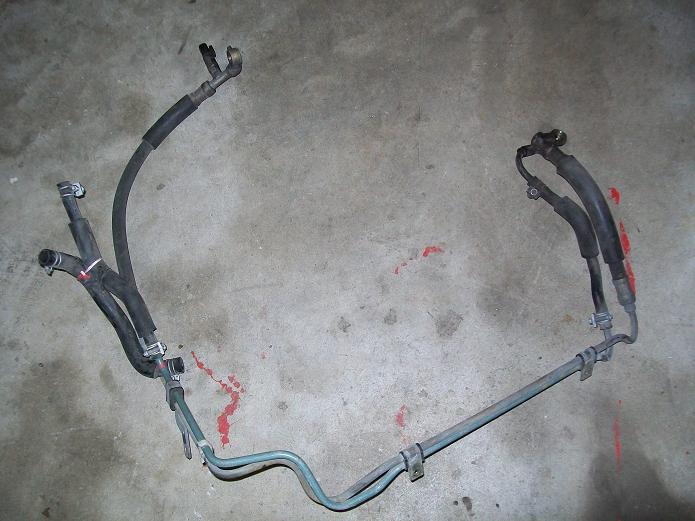
The lines had to be bent slightly to fit perfectly. But they work. The low pressure gets shortened. It comes from the OEM cooler on the radiator support and goes right to the box. Super simple.
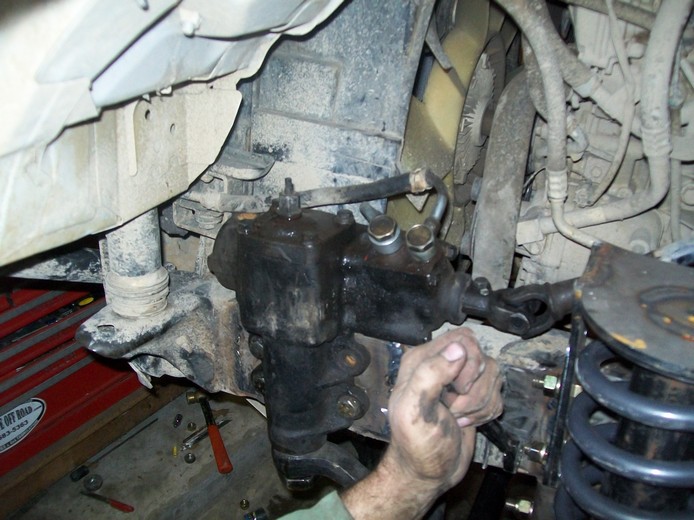
Can upgrade to a Datin longer pitman arm later to get tighter steering.
See the DOM SAS page for more pix.
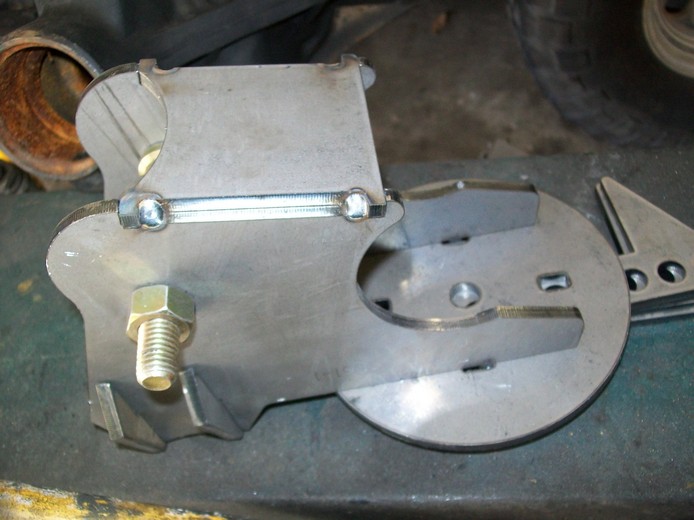
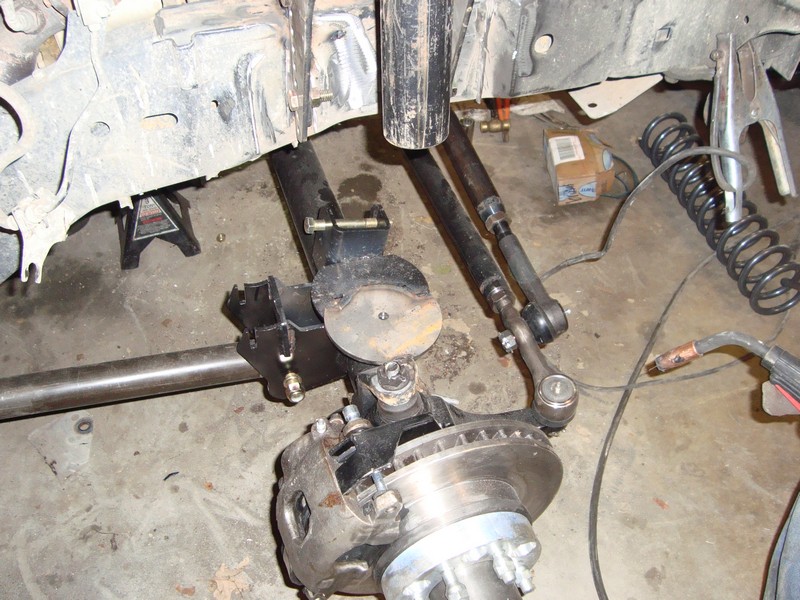
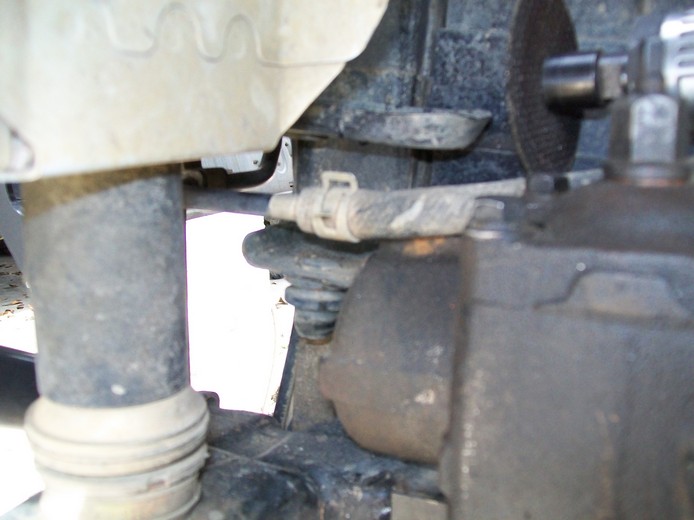
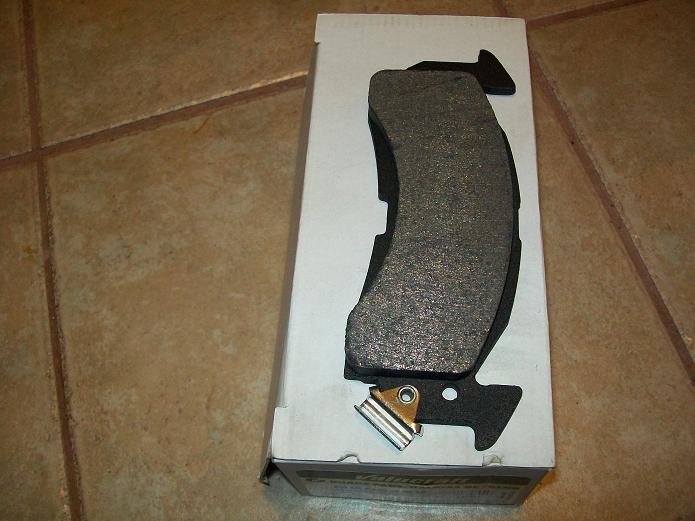
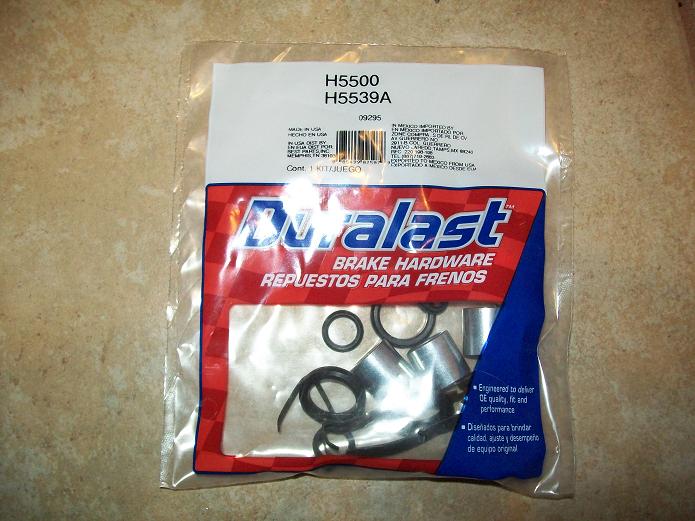
11. FRONT BRAKES
Prepare axle parts - cut off dust shields
form caliper brackets and paint. I had to buy a complete hardware
kit just for the pad clips.
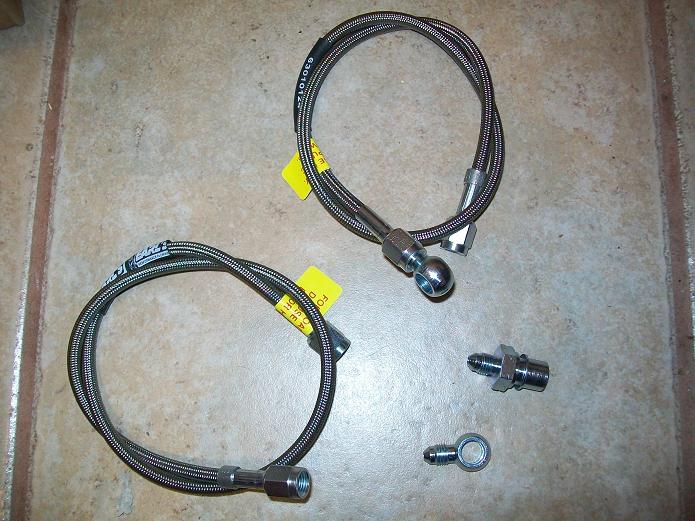
24" long 10mm to 10mm. Nissan and Dana 44 axles (gm/jeep calipers) use
10mm.1980+ are all 10mm. Just like Nissan. If You already have longer
aftermarket brake lines they will work. The stock d40 lines would work,
but they are very short since these is very little wheel travel with
IFS.
To install the rotors, they are connected to hub via wheel studs. Install rear bearing, wheel seal, rotor then new wheel studs.
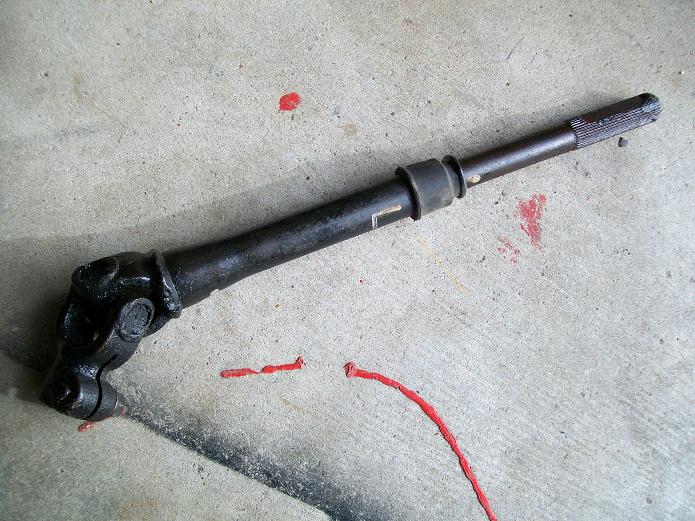
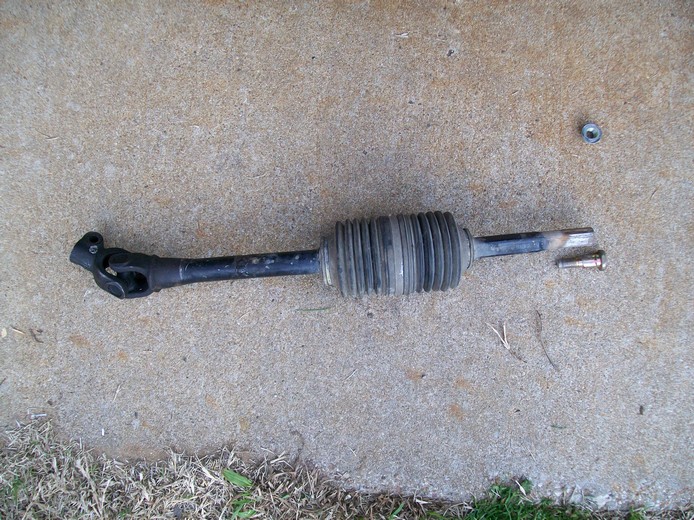
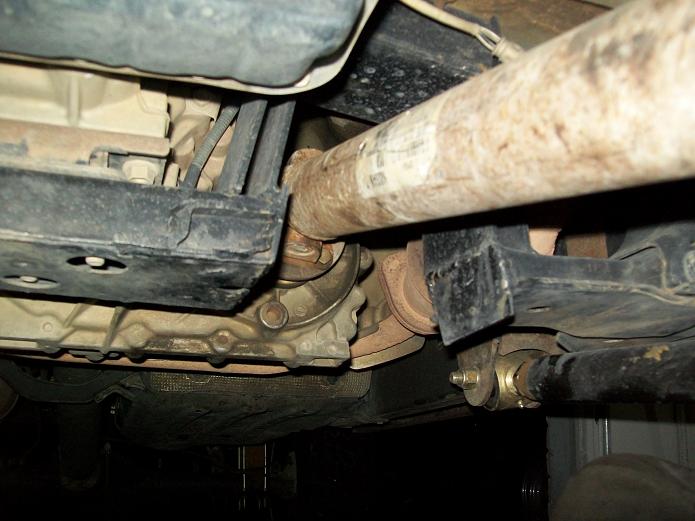
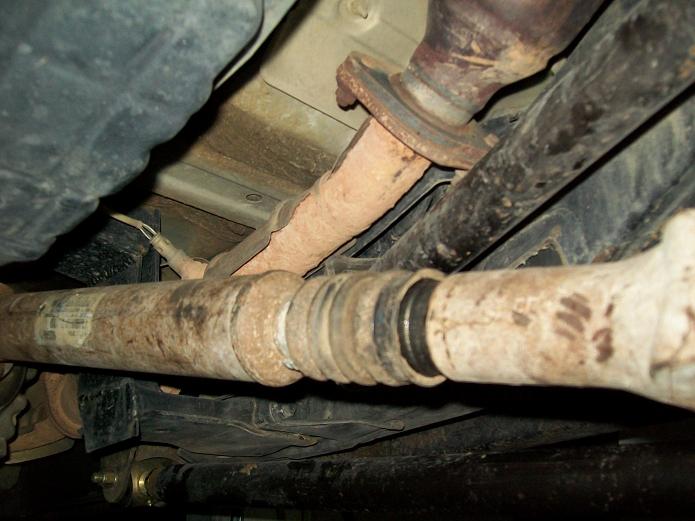
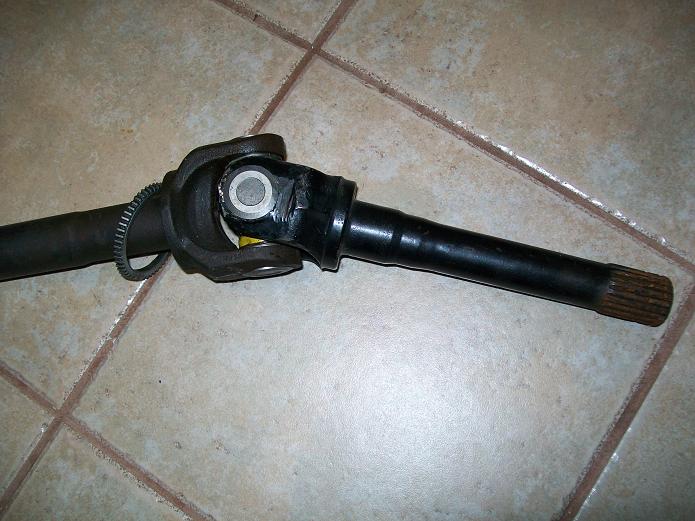
12. FRONT DRIVESHAFT
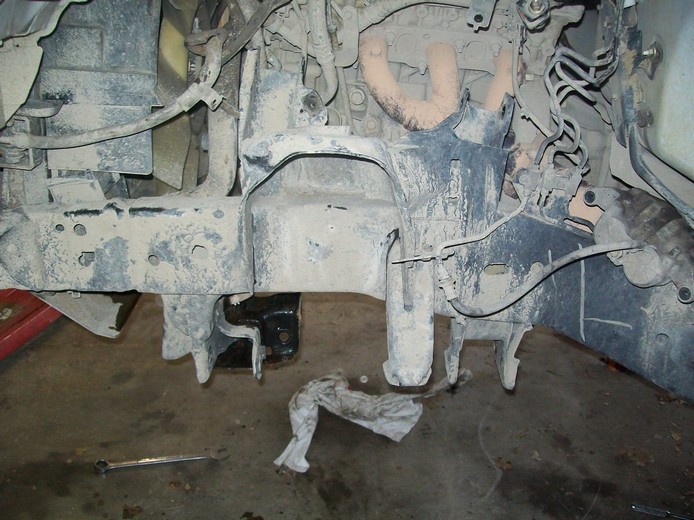
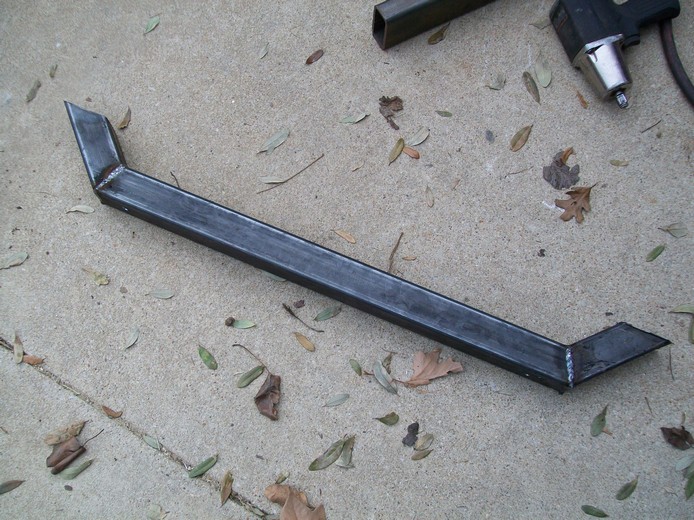
13. TRANS CROSS MEMBER
First step was mark for clearance on the cross member before removing. The added a arch and then cut away the bottom section.
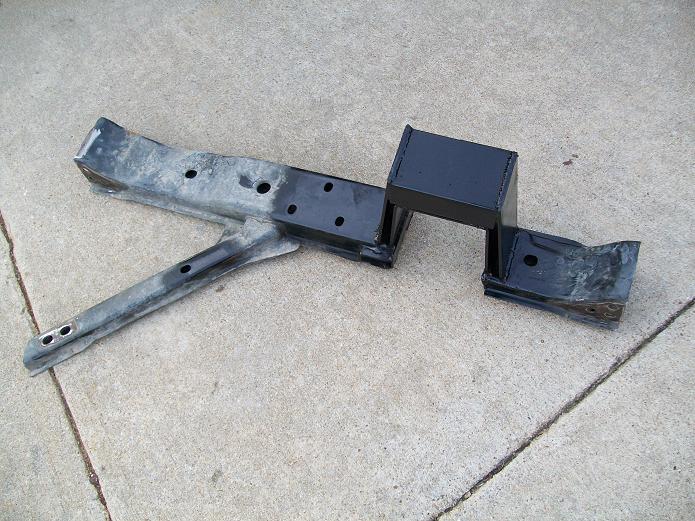

This may be reinforced or modified depending on driveshaft clearance testing.
Works fine with stock shaft. CV shaft also clears.
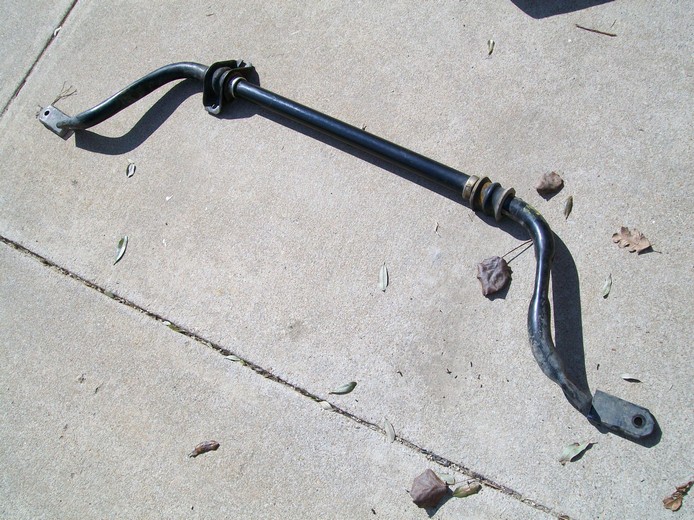
14. SWAY BAR
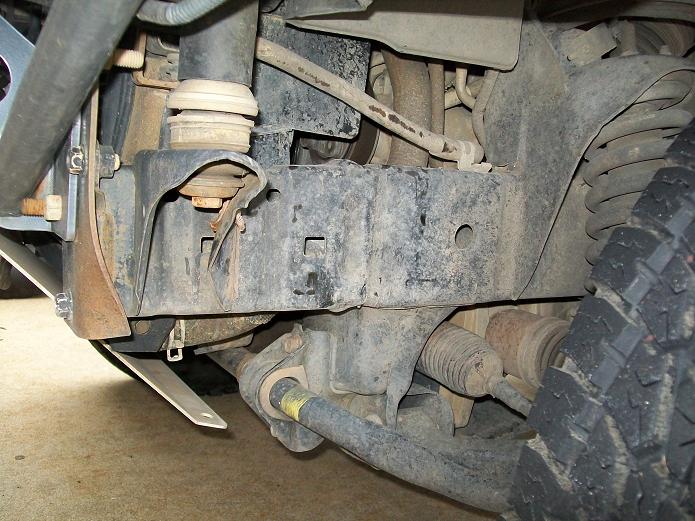
Here is the new cross member to hang the sway bar and skid plate for plastic radiator.


15. REAR SUSPENSION
Will start with some blocks to level it out. Also lower the stock shackle hanger. This will do 2 things. 1. increase ride height while maintaining a short shackle length. 2. Convert to normal flat shackle plates.
These 4" lift blocks just need the pin hole enlarged on the axle to bolt right up.
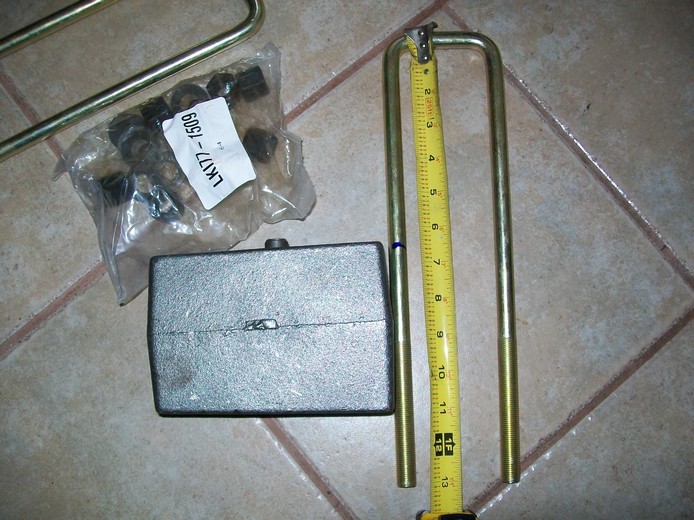
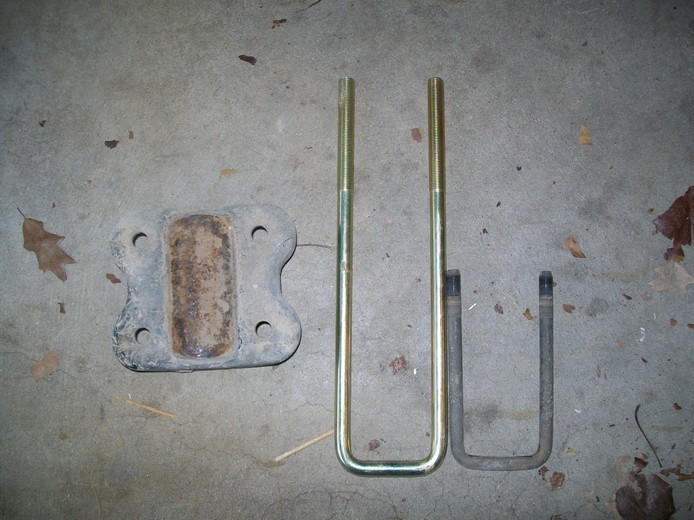
Stock with 3" BL and 2" ADD aleafs and now with 4" blocks. The block may be removed or use smaller ones. Plan to try new custom shackles.
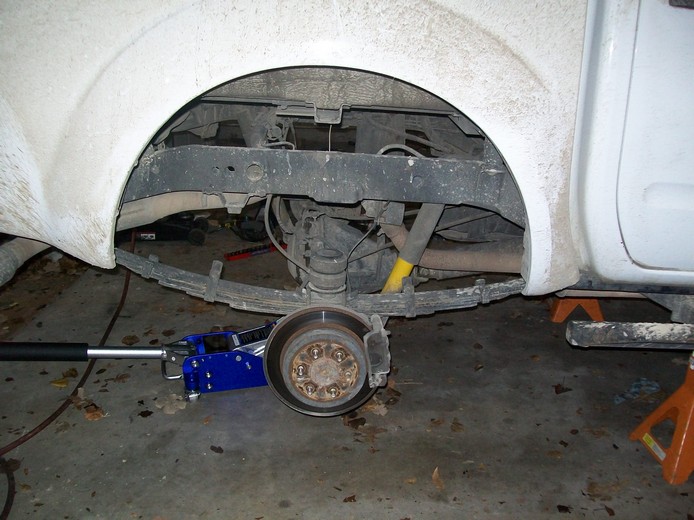

The shocks were too short to reinstall and hang down too low for a 4wd truck. So relocated the mounts upwards a few inchs.
Here is the new shackle hanger. Its a generic 2.5" spring hanger with a poly bushing. This to get more height in the rear. Can make shackles to get the correct ride height. Truck already has a 3piece add a leaf.
Had to add a 1/2" ID dom to sleeve leaf bushings.
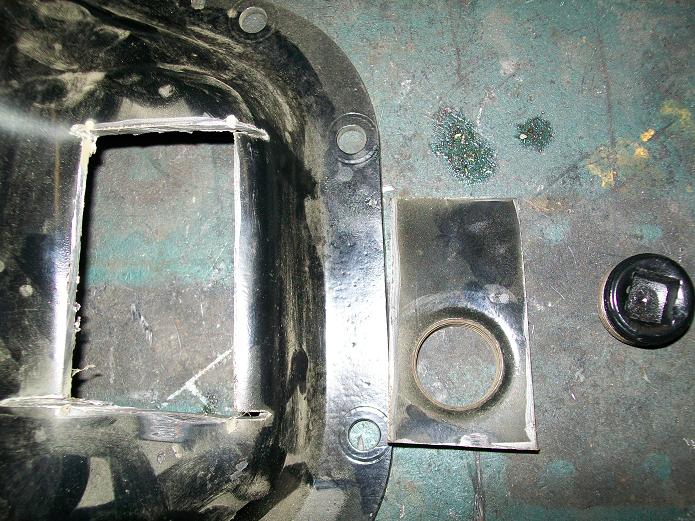
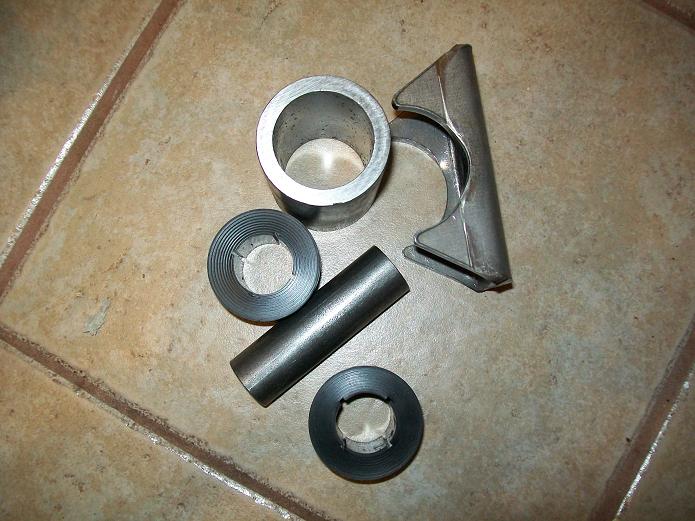
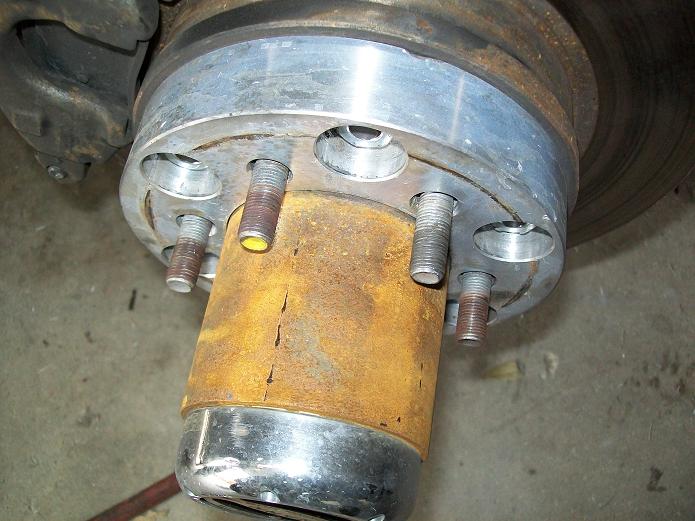
16. Wheel adapters /Rims
Wanted to keep the existing 9 rims. Nissan used 6x4.5 in 2005 on the D40 for some unknown reason. The donor axle has the wrong 6x5.5 bolt pattern. So having a custom adapter made to convert the 6x5.5 to 6x4.5. This is also a 1.25" spacer. Now 4 of the existing 16x8 rims will bolt on with some minor reaming on the center bore. Tried to ream the OEM alloys but it did not work. Here is the 6x5.5 to x4.5 adapter. These are available on ebay but this one was enlarged to 92mm to clear dana 44 hub.
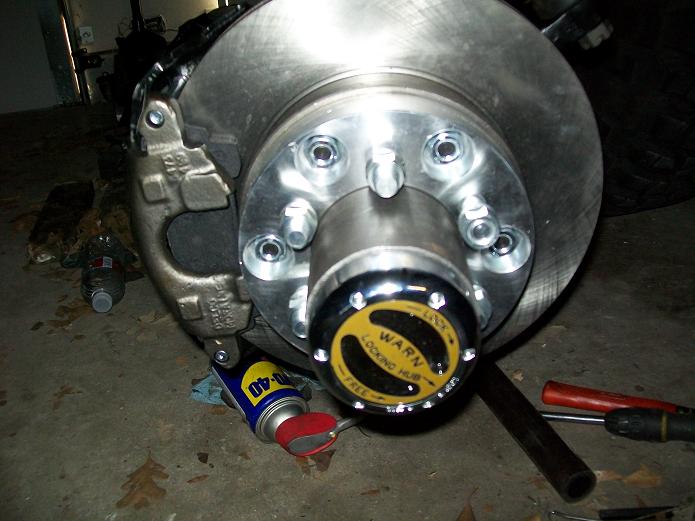
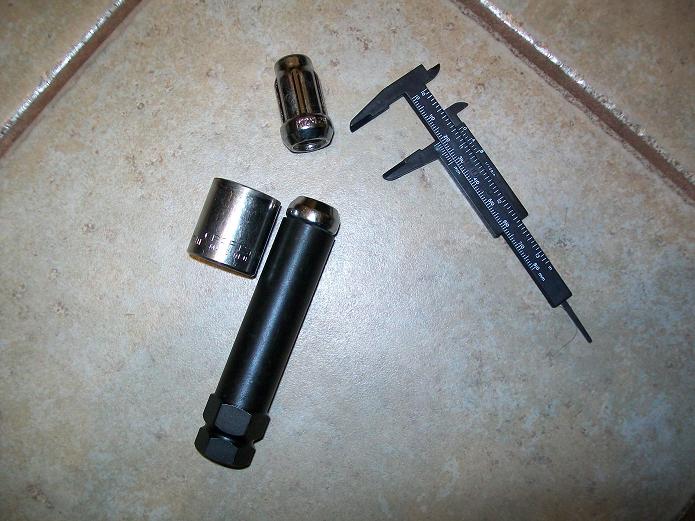
The dana hubs are so big the 19mm sockets rub on the hubs. Converted adapters from 14mm studs to 12mm using oem studs.
Then found some spline drive nuts. Works great.

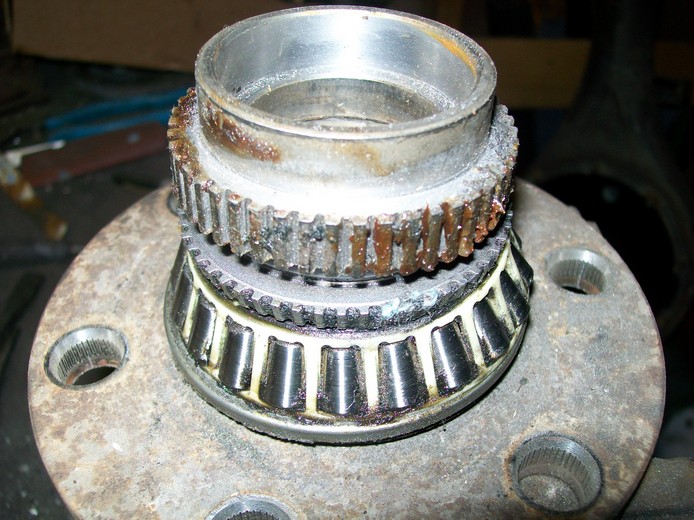
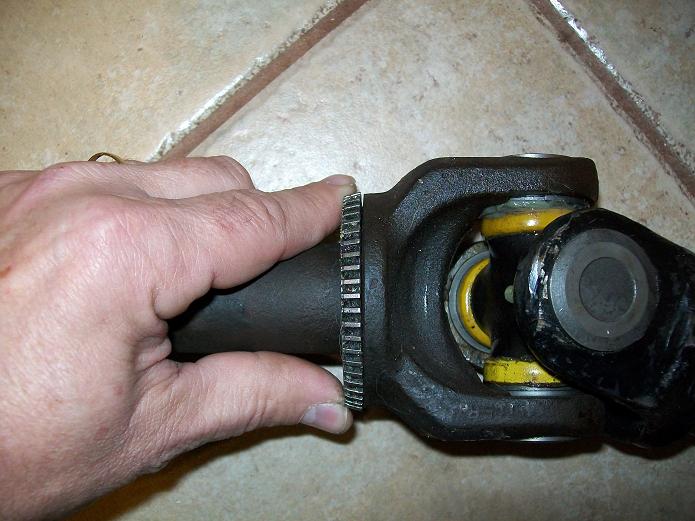
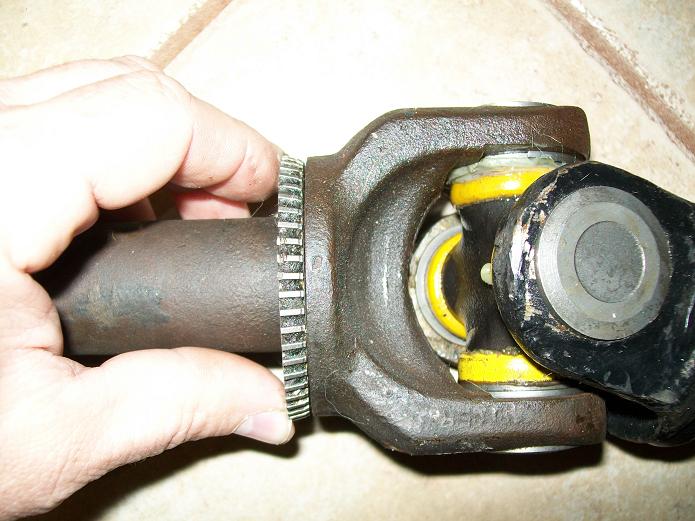
17. Tone rings
Testing with the front ABS sensors unplugged that the front ABS tone rings are not required for Speedometer or transmission shifts. The rear ABS sensors do this function. But we would like to reinstall the ABS sensors and OEM calipers so it will be as good as stock. No dash lights etc.
First step was find the ABS tone ring. Its hidden inside the unit bearing. Under the label that says "do not dissassemble".

First pop out the studs.


Then cut the back off and press the piece apart.
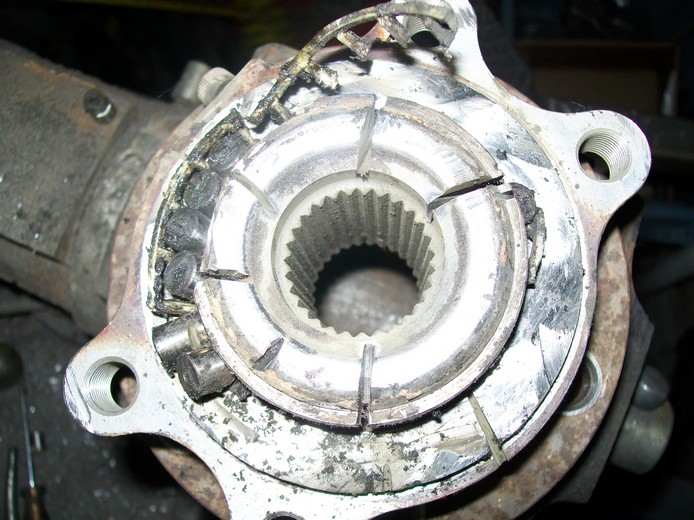
I had to cut the unit bearing apart then press apart to see the tone ring.
The h233 d22 tone ring is almost identical. d22 is 48 teeth 62mm OD and d40 is 54 teeth at 64mm OD.
Here is the tone ring mocked up on the axle shaft. Not sure if it will clear the tube.
Part and service Suppliers.
Poly Performace - Link frame brackets, Track bar brackets, poly link ends