![]()
Clutch replacement on 93 Nissan Truck - D21 with a SAS
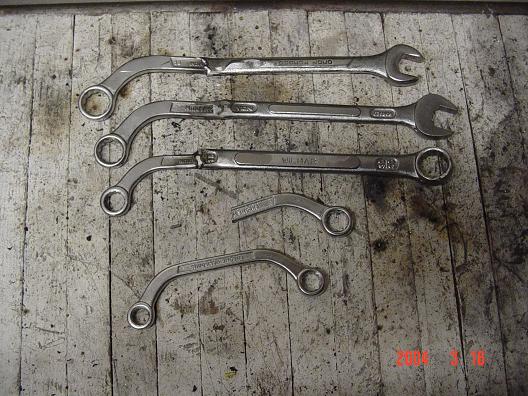
Tools needed. Numerous sockets and wrenchs, torque wrench, Floor jack, trans jack, jack stands, Clutch Alignment tool, 2 jaw puller, bearing seal install tool, pilot bearing puller, snap ring pliers, philips, swivel 14mm sockets and long extensions.
![]()
![]()
- Disconnect battery, trust me.
- Raise vehicle and place on jack stands. I use wheel ramps for front and jacks under rear axle. On a flat level hard surface. (Garage). Truck was already high enough.
- In side vehicle remove, center console and shifter boots.
- Remove shifter knobs. They unscrew. normally really tight.
- Using snap ring pliers remove trans shifter.
- Drain transfercase oil. You can leave oil in but it will leak some when rear dshaft is pulled.
- Disconnect transfercase shifter at joint from below, remove shifter from inside.
- Remove exhaust Y pipe.
- Unplug all electrical connectors on trans.
- Unscrew and remove speedo cable from tcase. No oil will come out.
- Remove both drive shafts.
- Remove 2 starter bolts from trans side and leave starter wires connected and in vehicle.
- Remove the 2 14mm bolts holding on Clutch slave cylinder, zip tie up and out of the way. Do not disconnect hydraulic line.
- Remove both transmission mount bolts and 17mm nuts at the mount.
- Remove all visible lower 14mm bolts that connect trans to engine. They go in both directions.
- Put a Transmission jack or jack stand under transfer case and remove the 4 14mm bolts from Trans crossmember and remove crossmember, placing weight of trans/TC on Jack.
- Now lower the rear transmission enough so you can access the UPPER 14mm bolts.
- Remove all upper 14mm bolts with swivel sockets on 24" extensions.
- Now you should be ready to place trans jack under transmission/TC and remove both as a unit. Bolt trans to jack. 2 men are better than 1 here.
-
Lower and remove unit from vehicle and set aside.
- Remove bearing and collar as unit from front of trans.
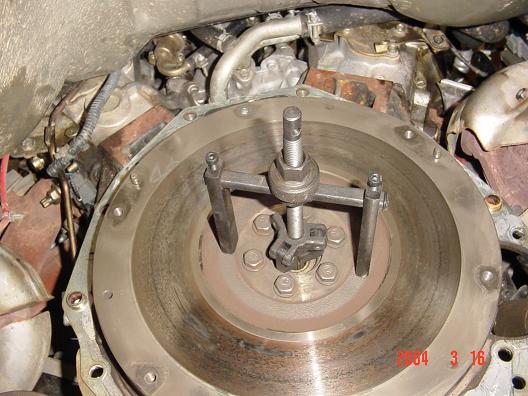
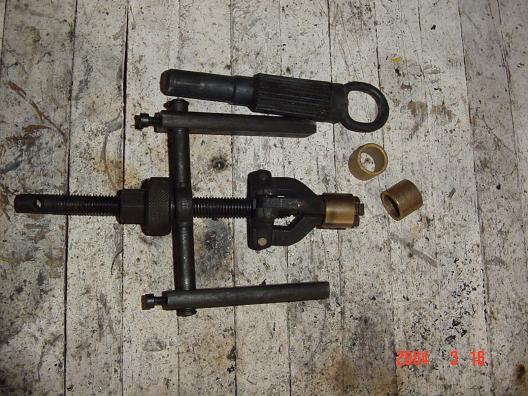
- To seperate collar from bearing: I use a round seal tool and a 2 jaw gear puller. see pic.
- Put clutch alignment tool in clutch disc.
- Now remove all 6 12mm Pressure plate bolts from flywheel.
- Remove clutch and pressure plate and discard.
- Remove pilot bearing bushing with suitable tool from crankshaft.
Installation:
- Insert new bushing in crankshaft.
- Check condition of flywheel, remove and resurface if damaged. I usually just rough up with sandpaper, just like brake job.
- Install clutch disc on flywheel with alignment tool.
- Install pressure plate and tighten in criss cross pattern see service manual. Tighten to torque specs.
- remove alignment tool.
- Put new bearing in bench vise with collar and press on.
- Put bearing on front of trans with a little grease inside collar.
- Raise trans an put back in.
- Put in the 14mm trans bolts first starting at the top. Leave trans leaning down.
- Install all Trans bolts and torque to specs.
- Install Starter.
- Install Slave cylinder.
- Install Trans mount.
- Install crossmember.
- Install both drive shafts
- Install y pipe
- Install Shifters
- Install center consoles.
- Remove fill plug on TC and fill to top of plug withDexron.
- Connect electrical connectors.
- Lower vehicle.
- reconnect battery.

modified pilot bearing puller.
Custom trans jack.
![]()
![]()
custom wrench for driveshaft removal